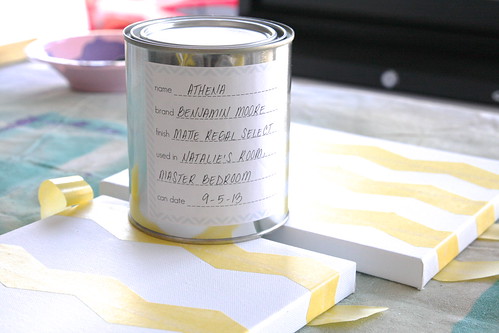
If you guys don’t know me by now, I’m a much better organizer than crafter. But sometimes I get a little inspiration under my wings and manage to surprise myself. When FrogTape® reached out to me about their product called Shape Tape, I took it as a personal challenge. Sure they were challenging me to see what I could come up with using this awesome product. But this was a great opprotunity to finally get some wall hangings up in Natalie’s room. The poor girl has had bare walls since we moved in last summer.
Since I’m a sucker for anything with my kiddos hand or footprints, I knew I wanted to somehow incorporate her hands and feet in this project.
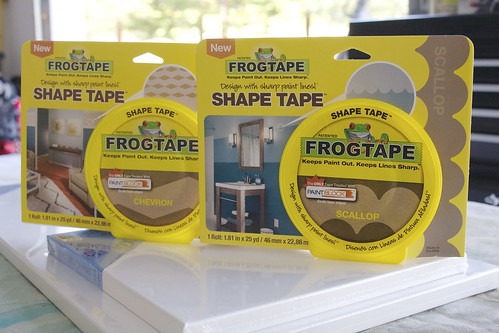
FrogTape® sent me 2 varities of their Shape Tape – Chevron and Scallop…
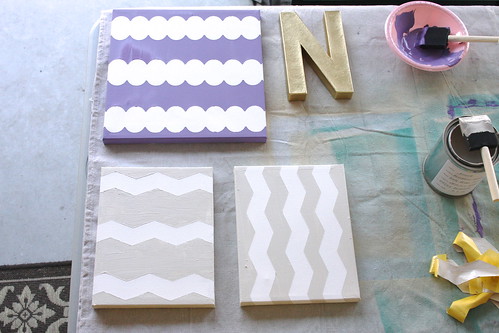
First thing I did was run into my local craft store to grab various sized canvas boards and a few small paint bottles. Natalie chose her favorite color, purple…
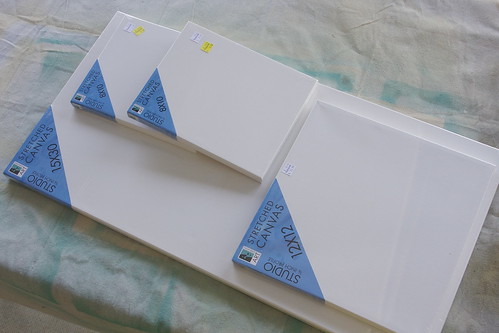
I purchased 1 15×30, 1 12×12, and 2 8×10’s. The 8×10’s were on clearance too – score!…

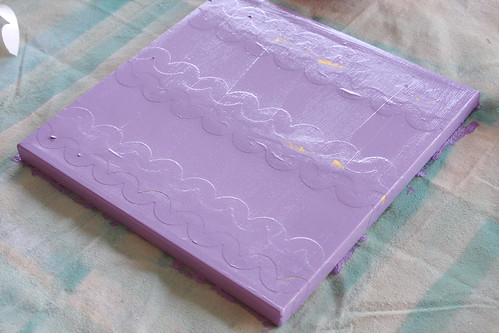
Starting first with the 12×12 canvas, I cut a few strips of Shape Tape, gently laid them on the canvas and created a feminine scallop shape…

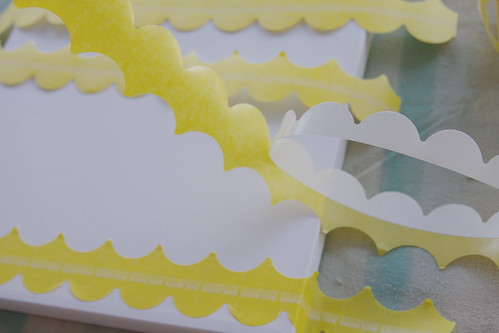
The trick to the scallop Shape Tape is peeling away one half of the backing, and then peeling away the other side. Then you easily place the tape on your canvas. Even if you are lop-sided, don’t worry! It easy to pull up the tape and re-position before you really set the tape in place…
I was going for a double scalloped edge, so I first placed the Shape Tape on the top and bottom…
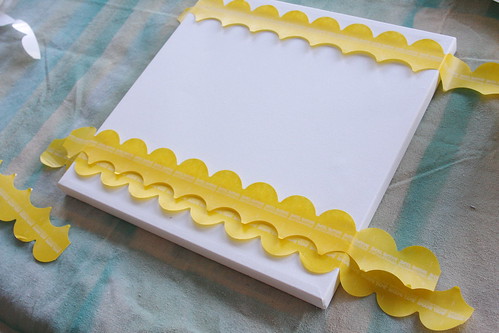
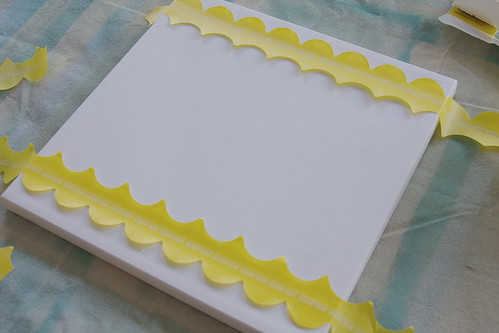
Then I placed a strip through the middle…
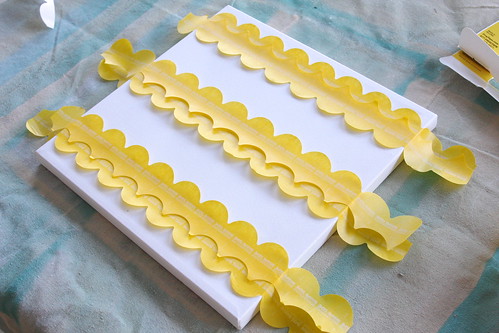
This is where you can play around to make sure the lines are evenly spaced, or where you would like them to be.
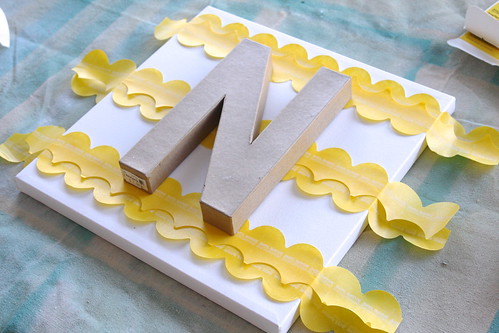
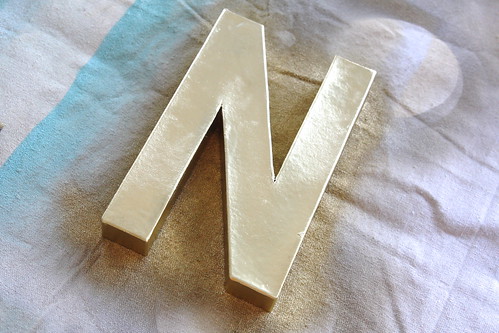
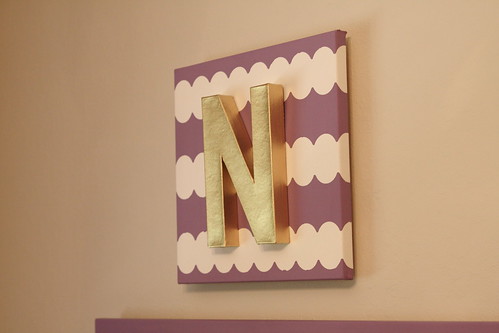
For a bit more dimension, I wanted to add Natalie’s first name inital over the canvas, so I played around with the “N” and the tape placement to make sure it was perfect before sealing the tape in place…
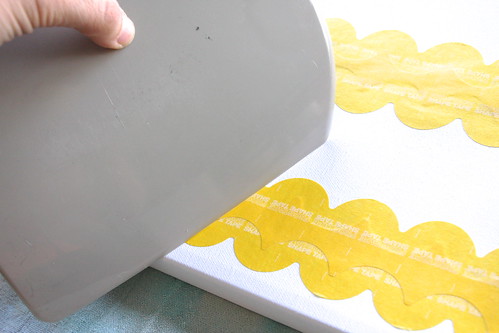
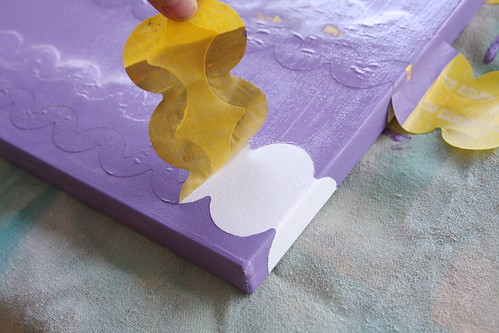
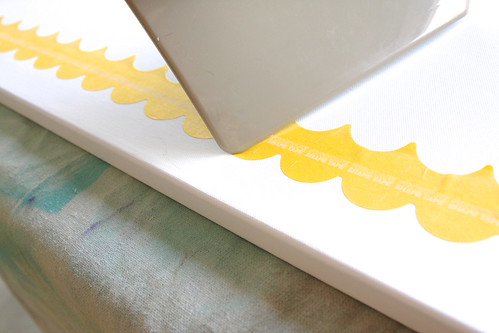
Once I was pleased with the placement, I used the edge of a plastic tool (or a squeegie, if you have one) to really seal down the tape edges. This engages the special PaintBlock® Technology that only FrogTape® offers, keeping your paint from flowing under the Shape Tape®, ruining your shape…
All secure!…

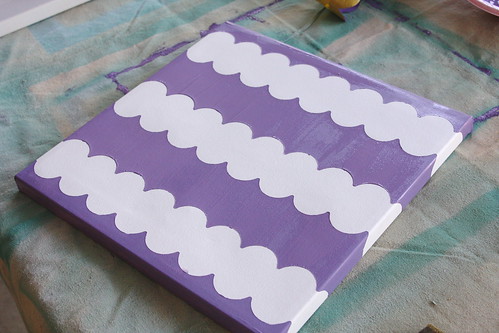
And ready for paint…

Purple paint, that is!..
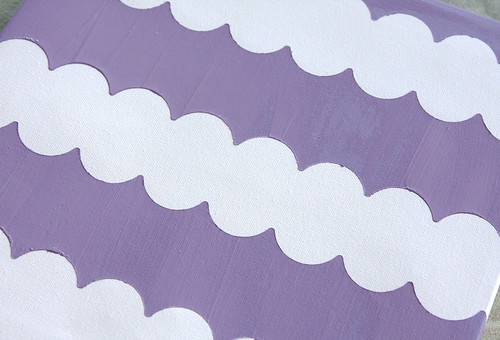
As soon as you’re done painting (I needed only one coat), peel the tape away to reveal perfectly crisp edges. It’s important to peel the tape away before your paint dries…

I couldn’t believe my vision became a reality! And it was so easy! This is exactly what I was dreaming of, but again since I’m not a “crafter” by nature, I was worried. Thanks to FrogTape® Shape Tape my idea was coming together…
I set aside the 12×12 canvas and gave a quick shot of gold spray paint to the “N”…
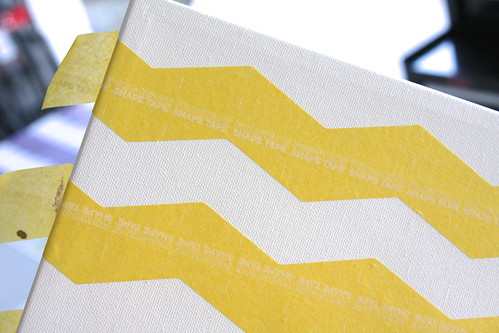
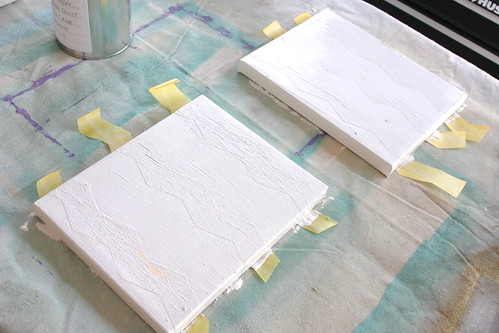
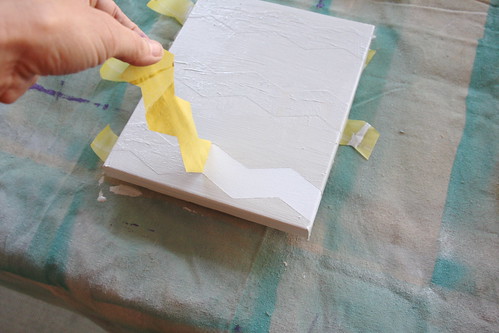
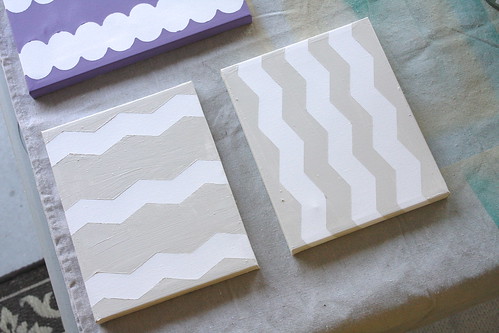
Now that the first canvas components were painted and set aside to dry, I got to work on the next project – the set of 8×10’s. Following the same process, I used the Chevron Shape Tape this time. I placed the Shape Tape where I wanted it…
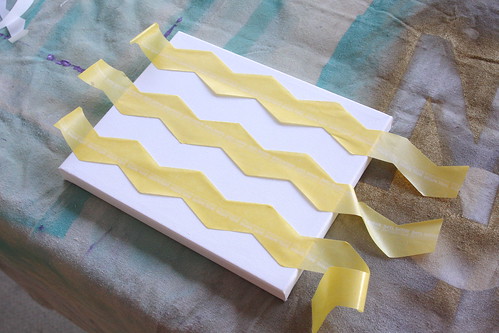
Then sealed it in place using the edge of my piece of plastic…
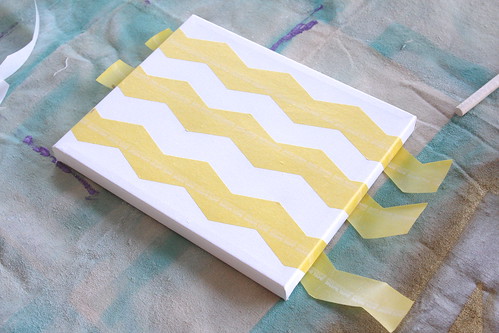
I planned on using this set of 8×10’s in a small wall gallery. Therefore, I kept the color palate more neutral by using the same wall color used on Natalie’s walls…
Just painted over the tape…
And once I was done painting, I peeled the Shape Tape away to reveal totally crisp designs…


I set these 2 aside and got to work on my final project…
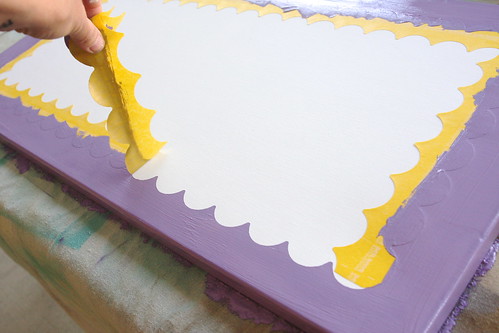
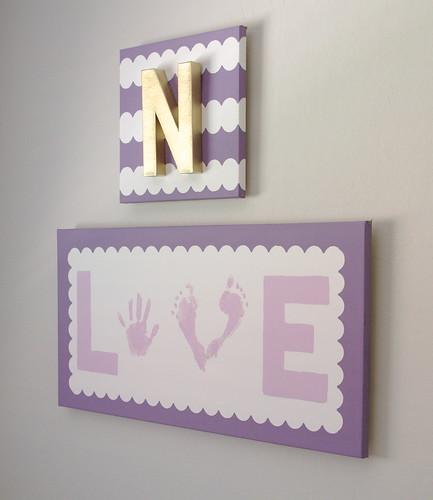
My final project was the largest canvas. I started out by creating an inner frame with the Scallop Shape Tape. I was incorporating 2 letters in the “love” art so I placed my letters on top of the canvas to make sure the Shape Tape was exactly where it needed to be…
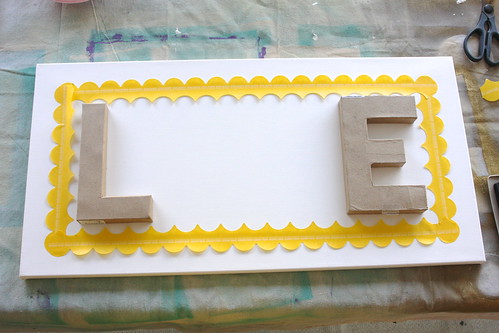
Once I was satisfied with the placement, I removed the letters and used my piece of plastic again to secure the Shape Tape in place….
Perfect!…

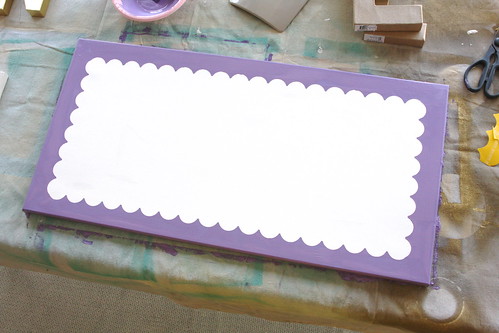
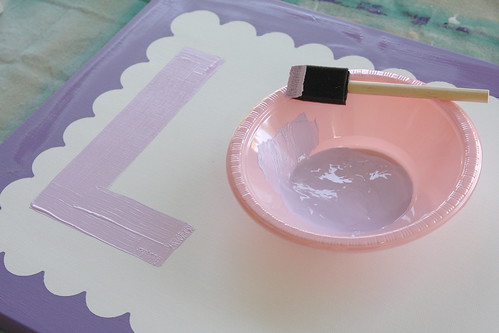
Now it was time for paint! I painted the edges a bold purple color…
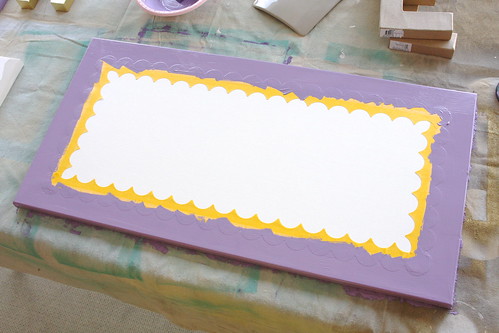
Then removed the Shape Tape to reveal crisp lines…
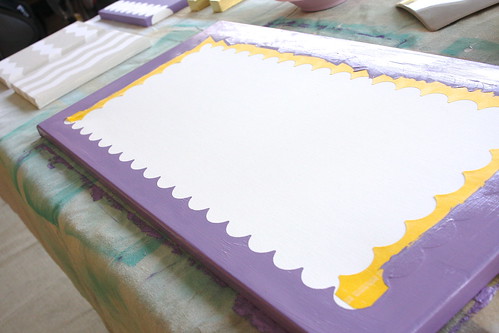
Beautiful!…
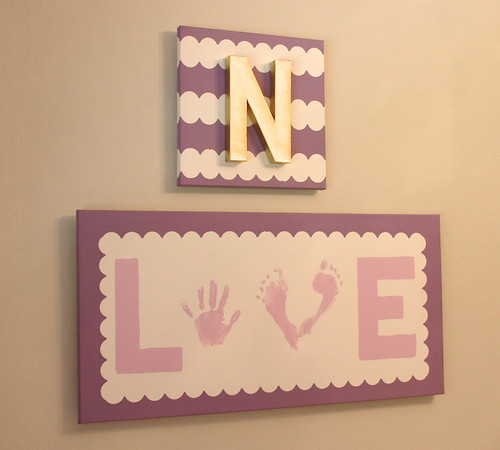
My little secret for a perfect “L” and “E” was tracing around the cardboard letters with a pencil…
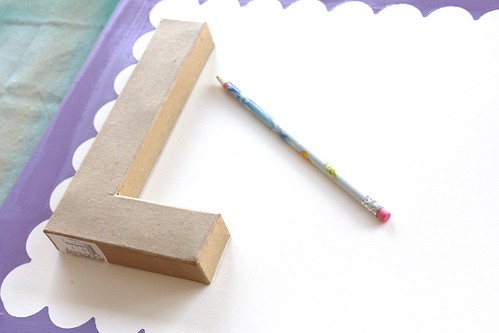

Then I simply filled in the letters with a lighter shade of purple…


Adorable!…
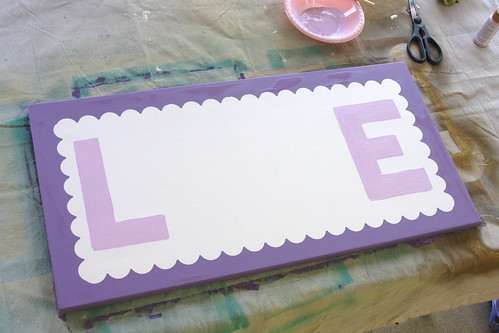
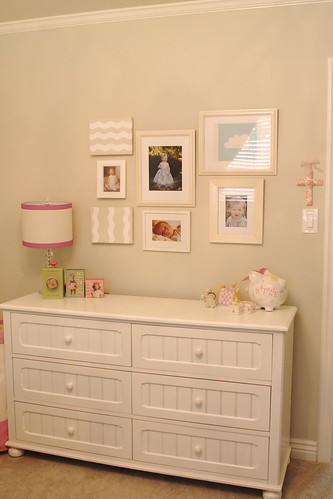
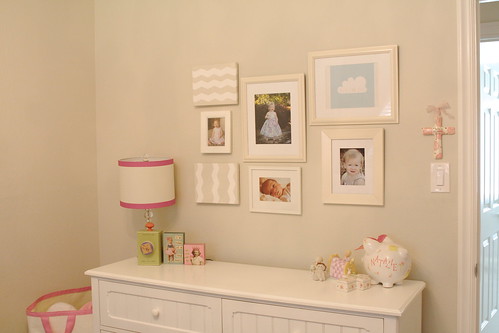
Wondering where the “O” and the “V” are? You’ll see! I had to wait for my little princess to get home from school for that part. So in the meantime I created that small wall gallery in her room. What was once an empty wall…

Now had life…
I’ll share more soon about how I created and hung this wall gallery…
After hanging the gallery, I added the “N” to the 12×12 canvas by adding adhesive strips to the back of the “N” and pressing firmly in place…

I allowed the adhesive to set for a good 30 minutes before hanging. Once my daughter arrived home from pre-school, we quickly added the handprint “O” and the footprint “V”. After allowing those to dry for 30 minutes, the canvas was ready to hang!…

So precious!!…

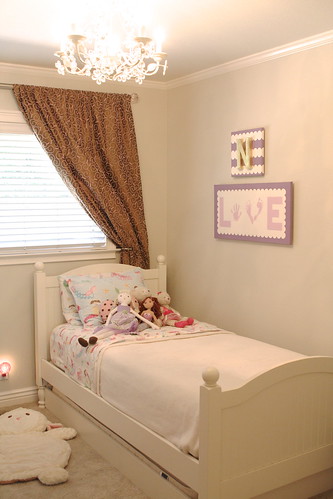
And it adds so much to her little room. More color and more personalization…
Made incredibly easy by using FrogTape® Shape Tape! FrogTape® is the only painters tape treated with Paintblock® Technology. PaintBlock is a super-absorbant polymer which reacts with latex paint and instantly gels to form a micro-barrier that seals the edges of the tape, preventing paint bleed.
I love this!…
And Natalie does too – she was beyond excited when she walked into her bedroom that afternoon….
I encourage you to try Shape Tape and share your projects with me. There are tons of great ideas on the FrogTape how-to page. Or you can find great ideas and inspiration on the FrogTape® Twitter page! Don’t forget to tag your projects with #FrogTape so they can see what you’re up to!
Of course, when I do anything creative in any space, things get moved around. While very soon you will see how I created her wall gallery, you’ll also see how I re-arranged her room and organized her toys. It’s just the inner organizer in me! I can’t help myself! Ha!!! 🙂
Have a creative day, friends!
I have been wanting to buy that Frog tape. Everything came out so cute. My favorite is the love sign.