One of my core beliefs in this work is that not every issue is solved by adding product. A fair amount of the time, clutter issues are solved by decluttering, space planning and / or editing your available space in general. When and if it makes sense, of course. This sweet little playroom really didn’t need much more than a few bins and two additional closet shelves.
PLAYROOM BEFORE
Mom reached out about the playroom – specifically the closet, where a large amount of the toys and games are stored…
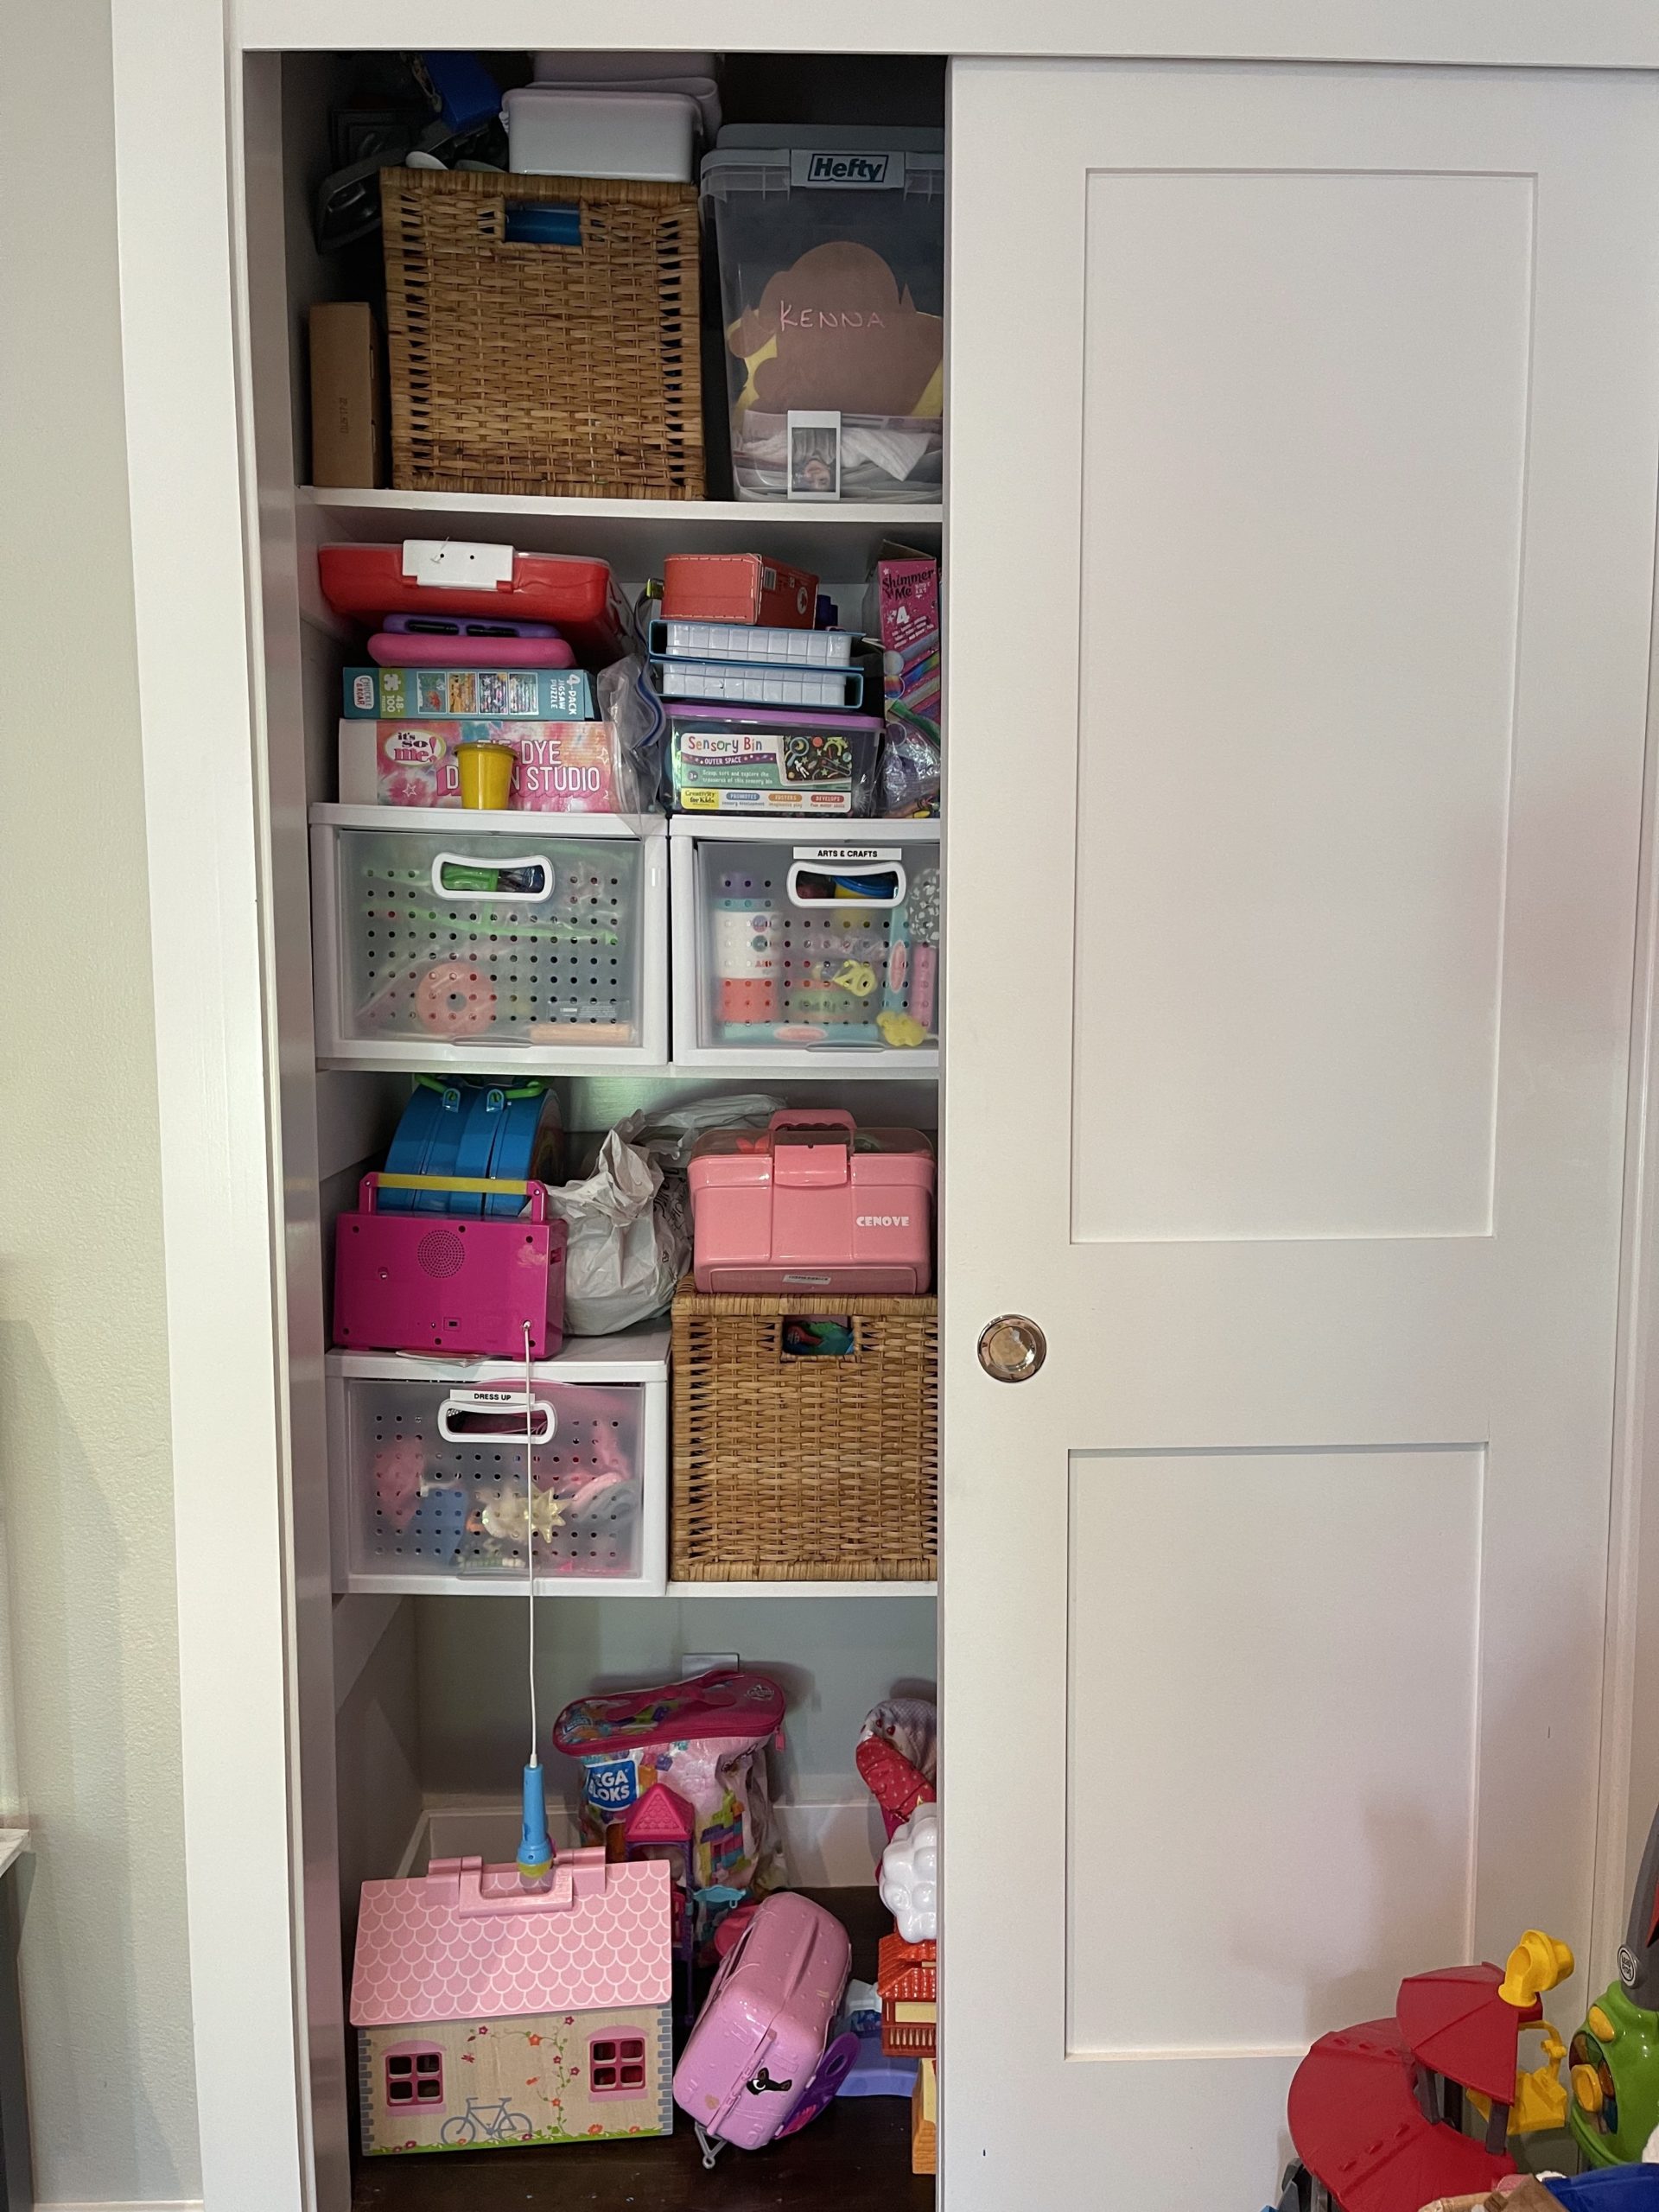
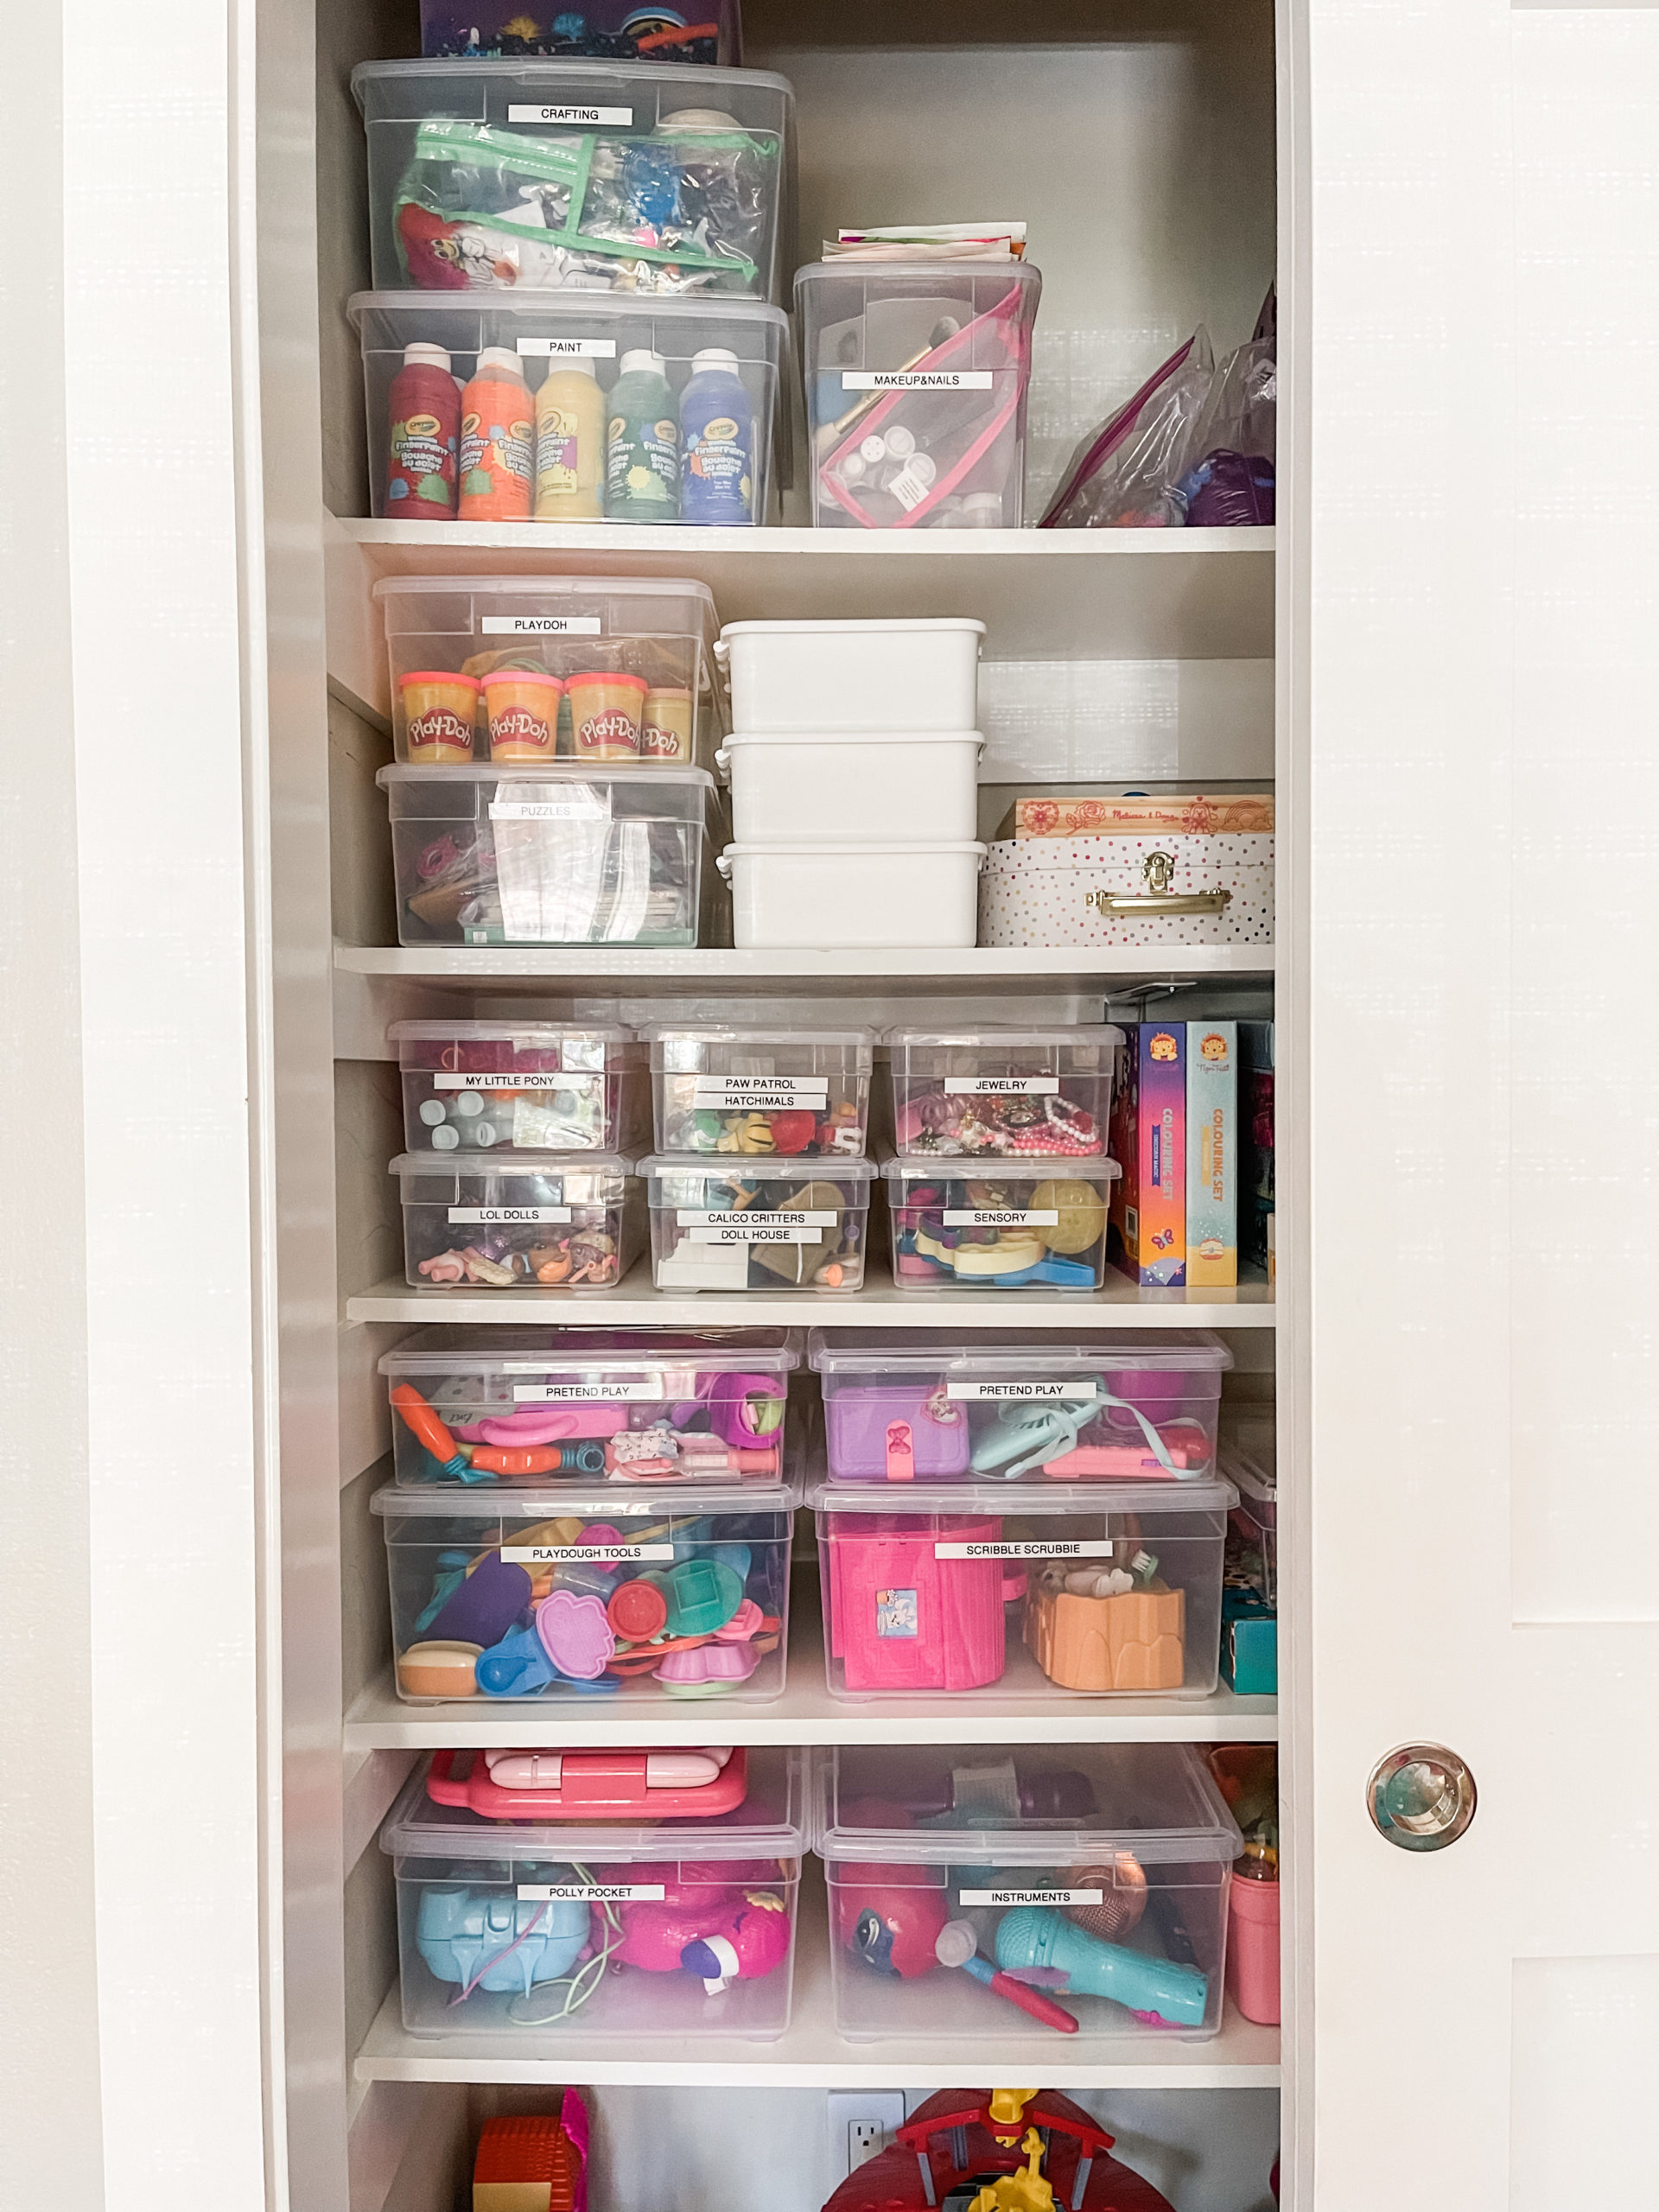
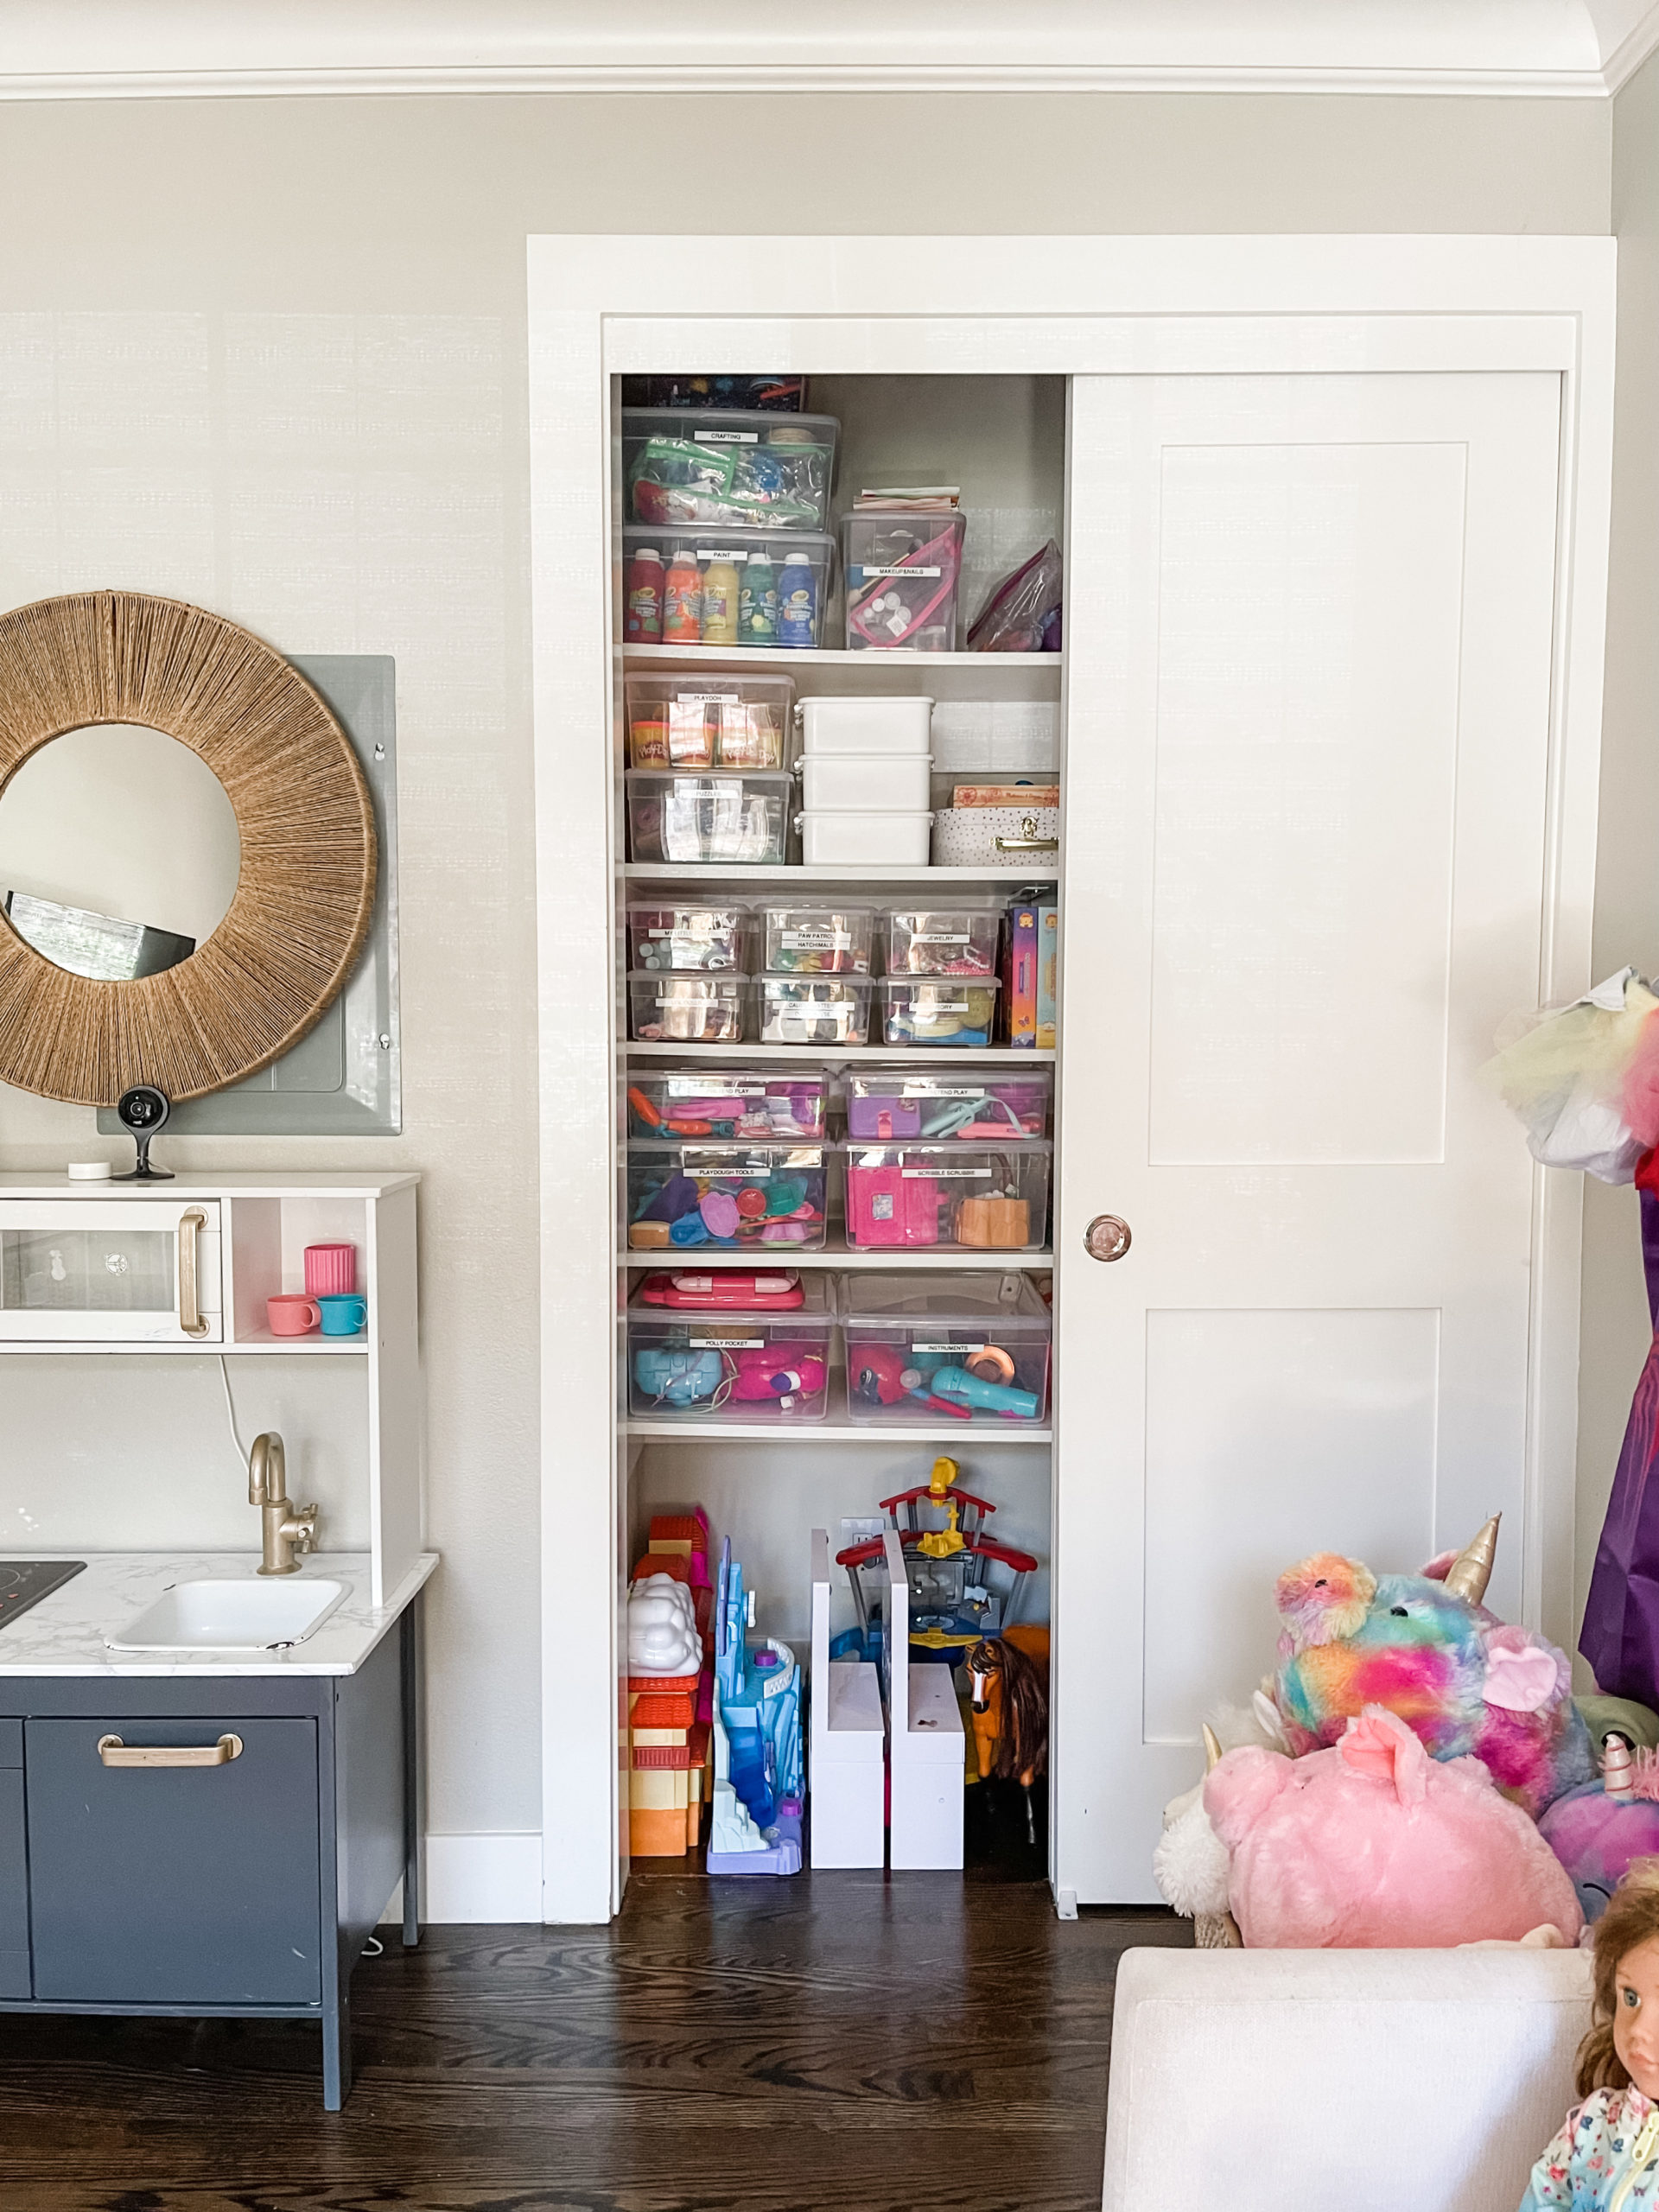
I could tell as soon as I saw the closet, the shelves were over the weight they could handle. She made incredible use of the space by adding drawers and stacking items on top, but the shelves were buckling under the weight of it all. Adding two shelves would give us a great amount of surface space and the ability to organize in a way that’s easy for them to access and put away.
You can see just how much space there was between the shelves…
My painter quickly made time to add two shelves and knocked it out in a day…
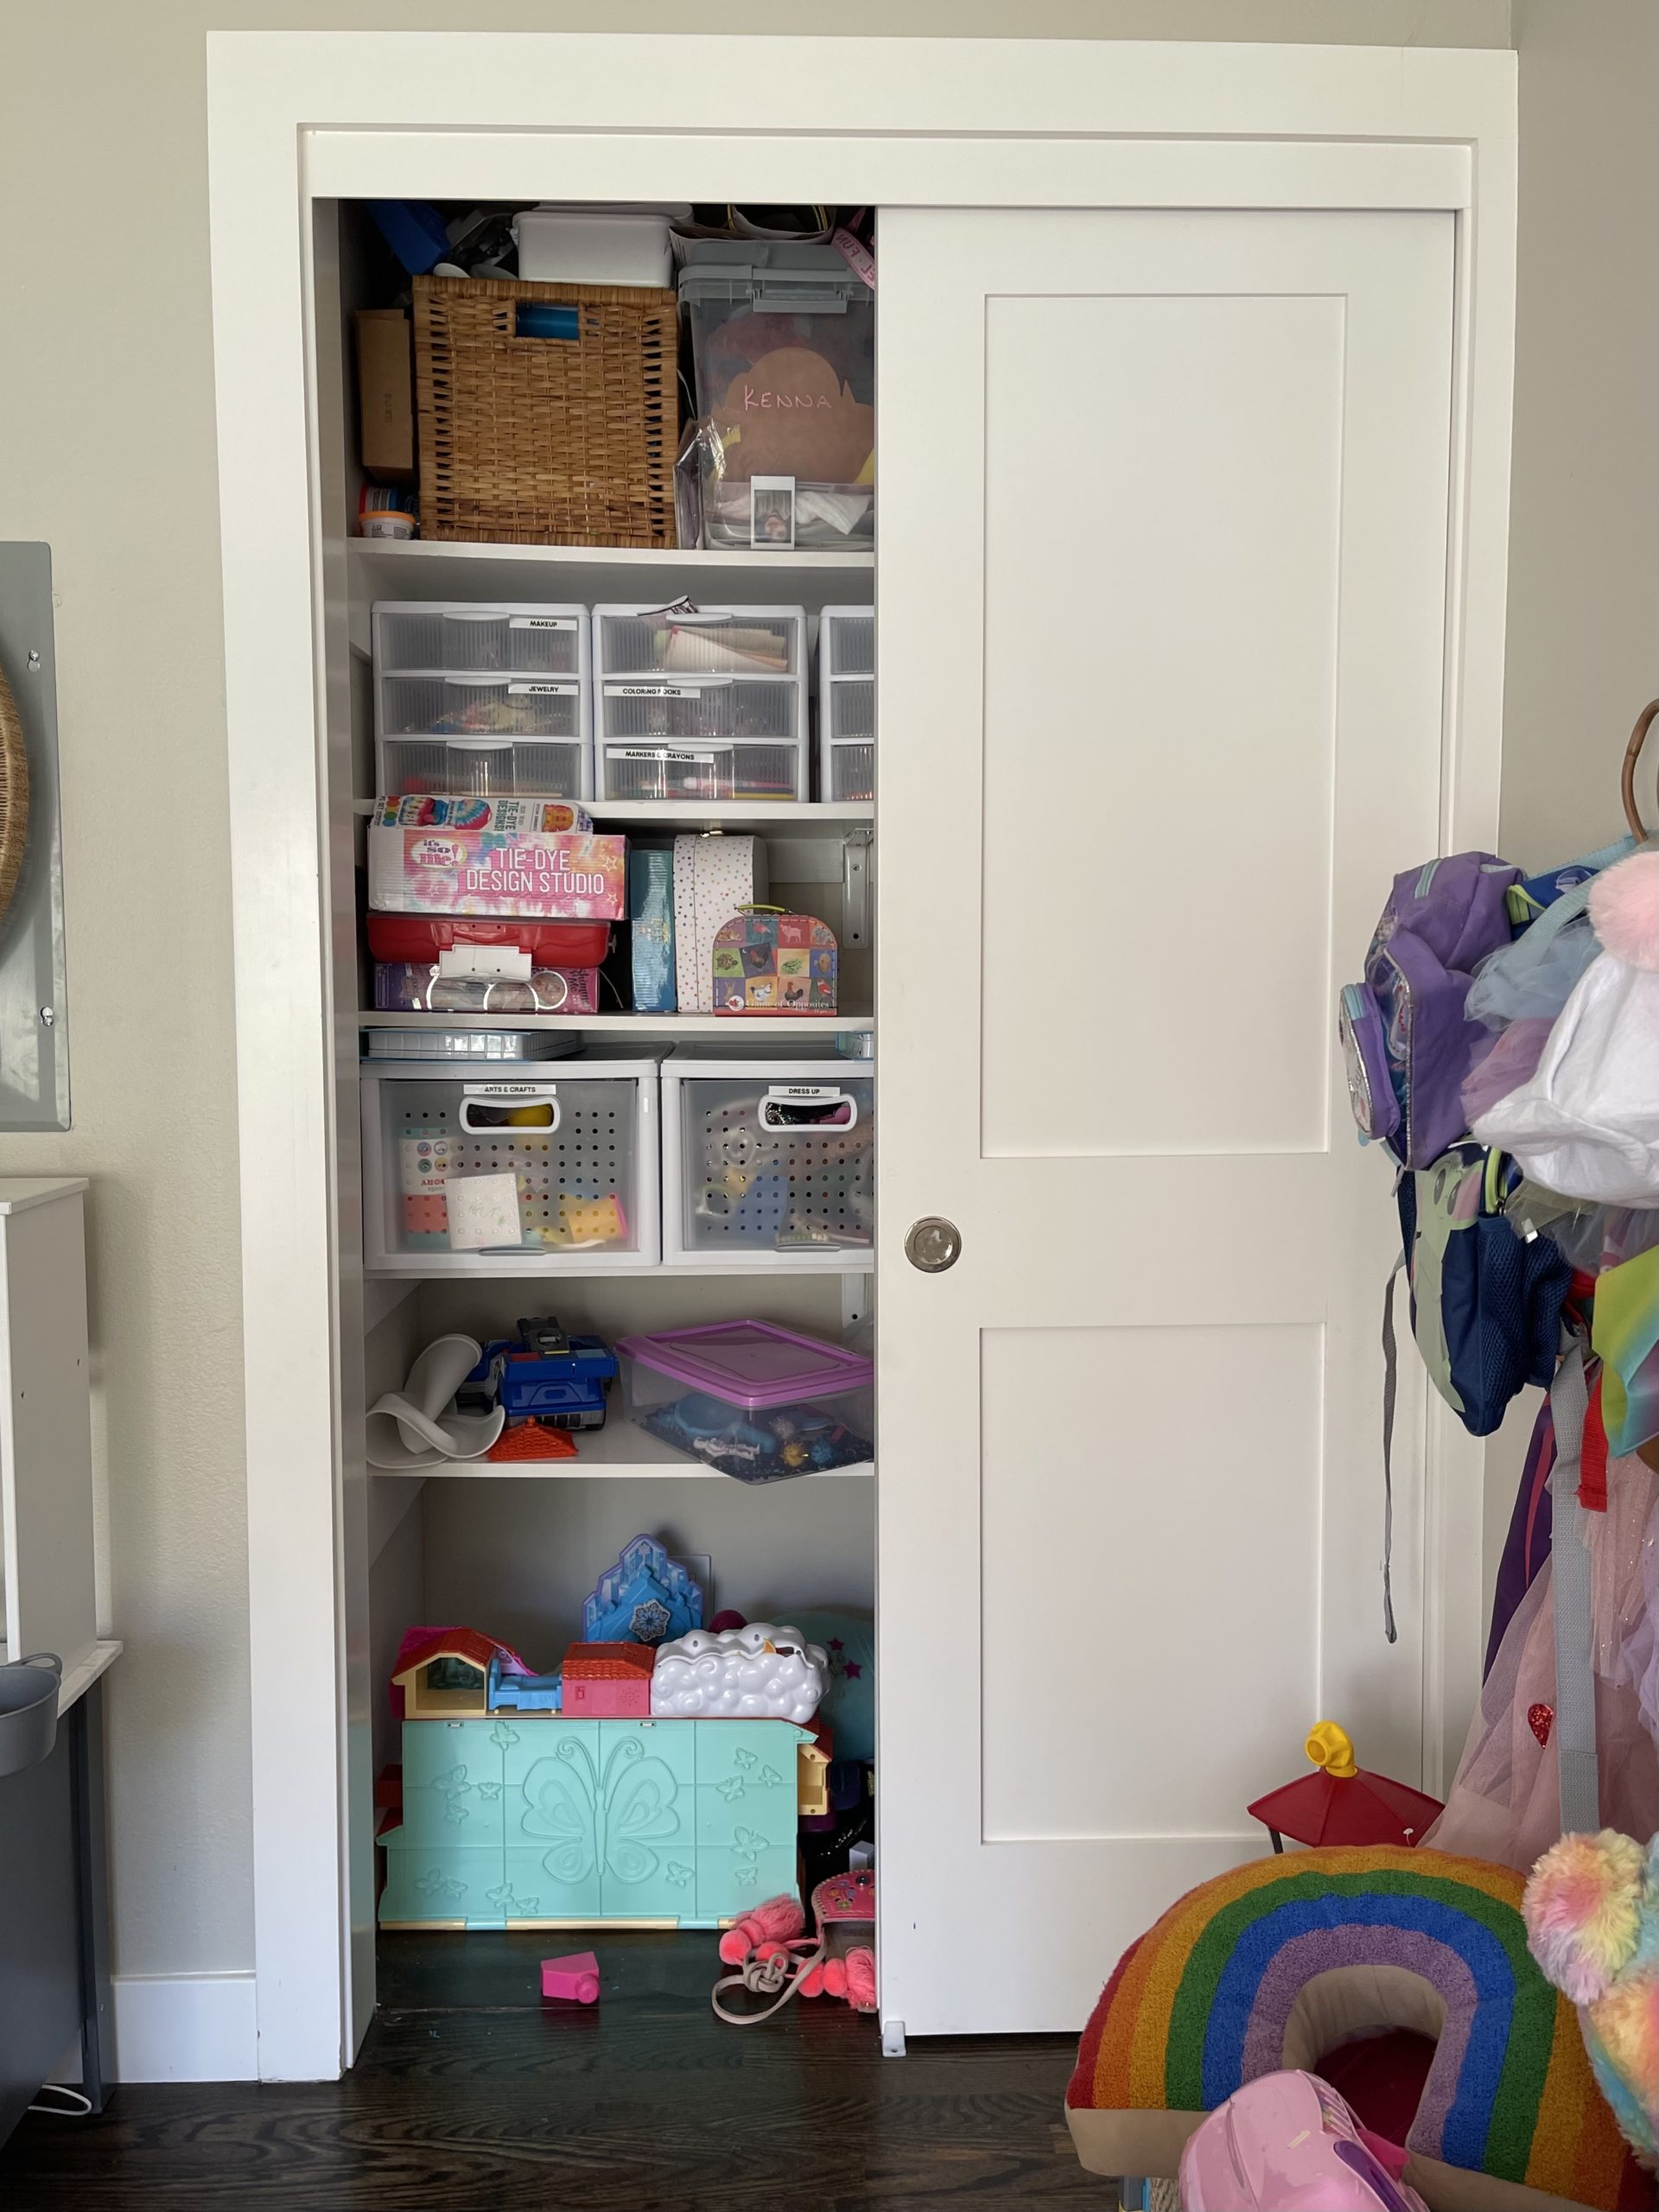
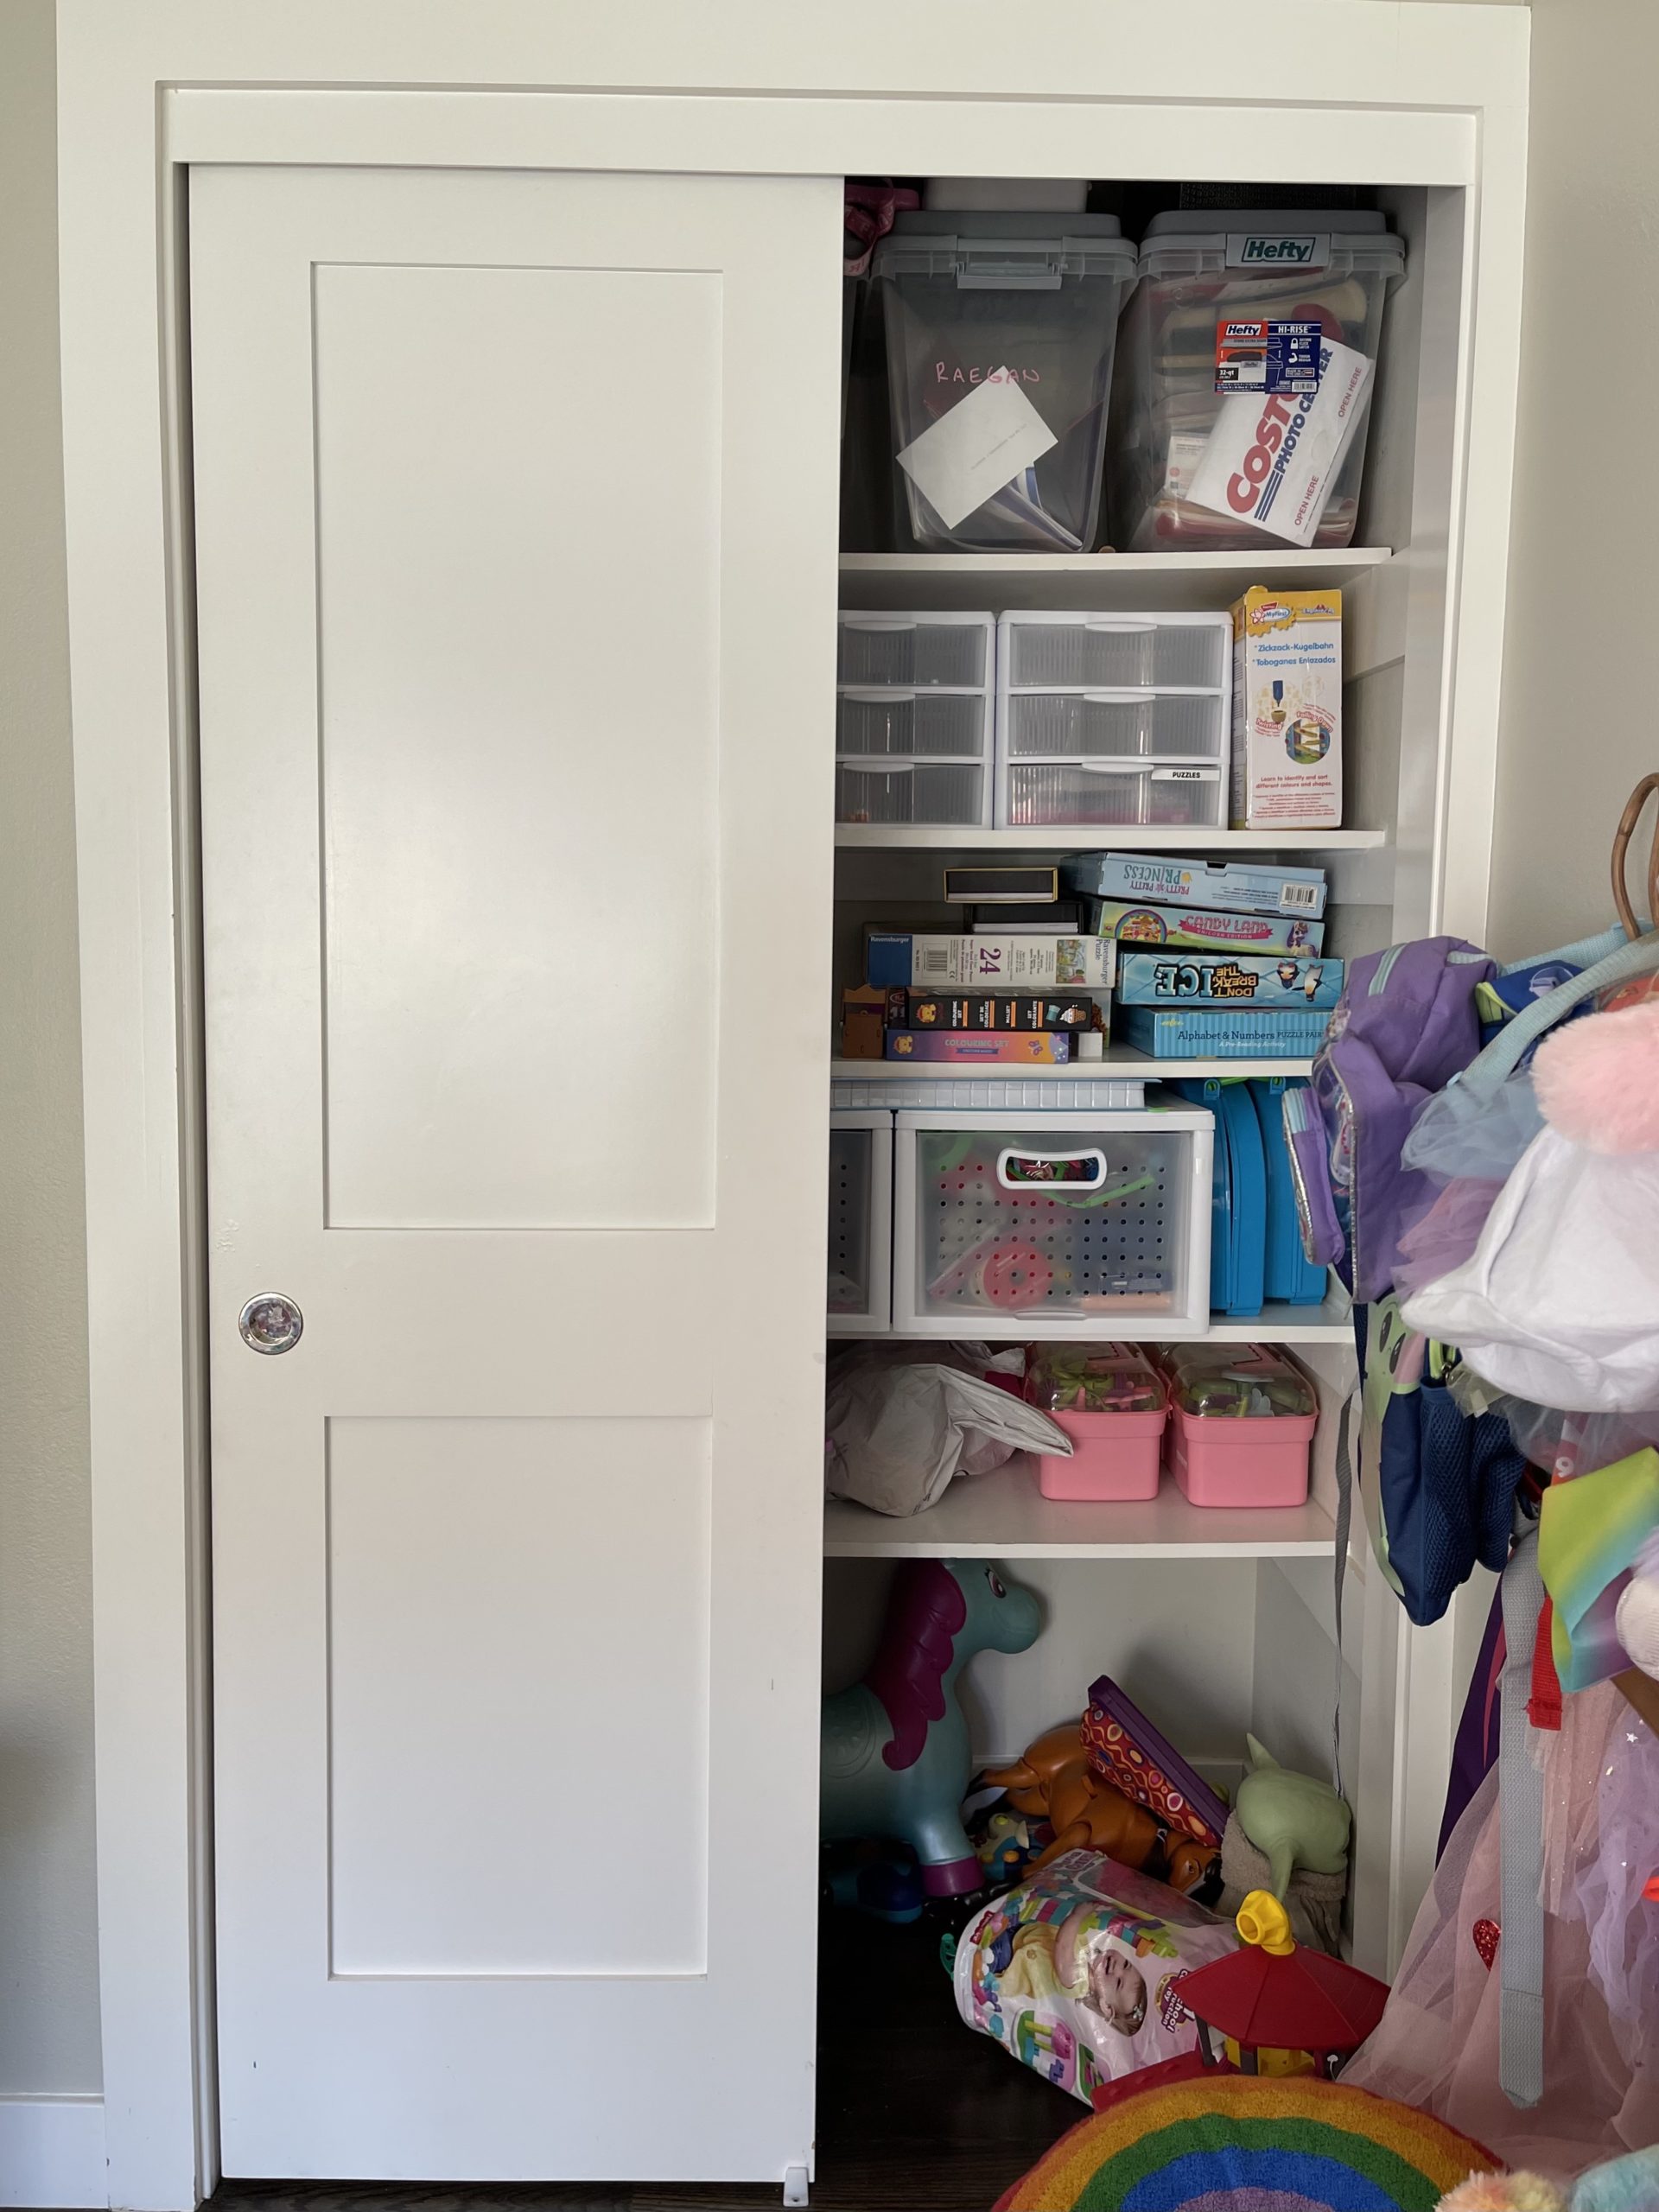
PLAYROOM AFTER
Once summer ended and the girls were back in school, we returned to declutter and organize. Take a look at this after!
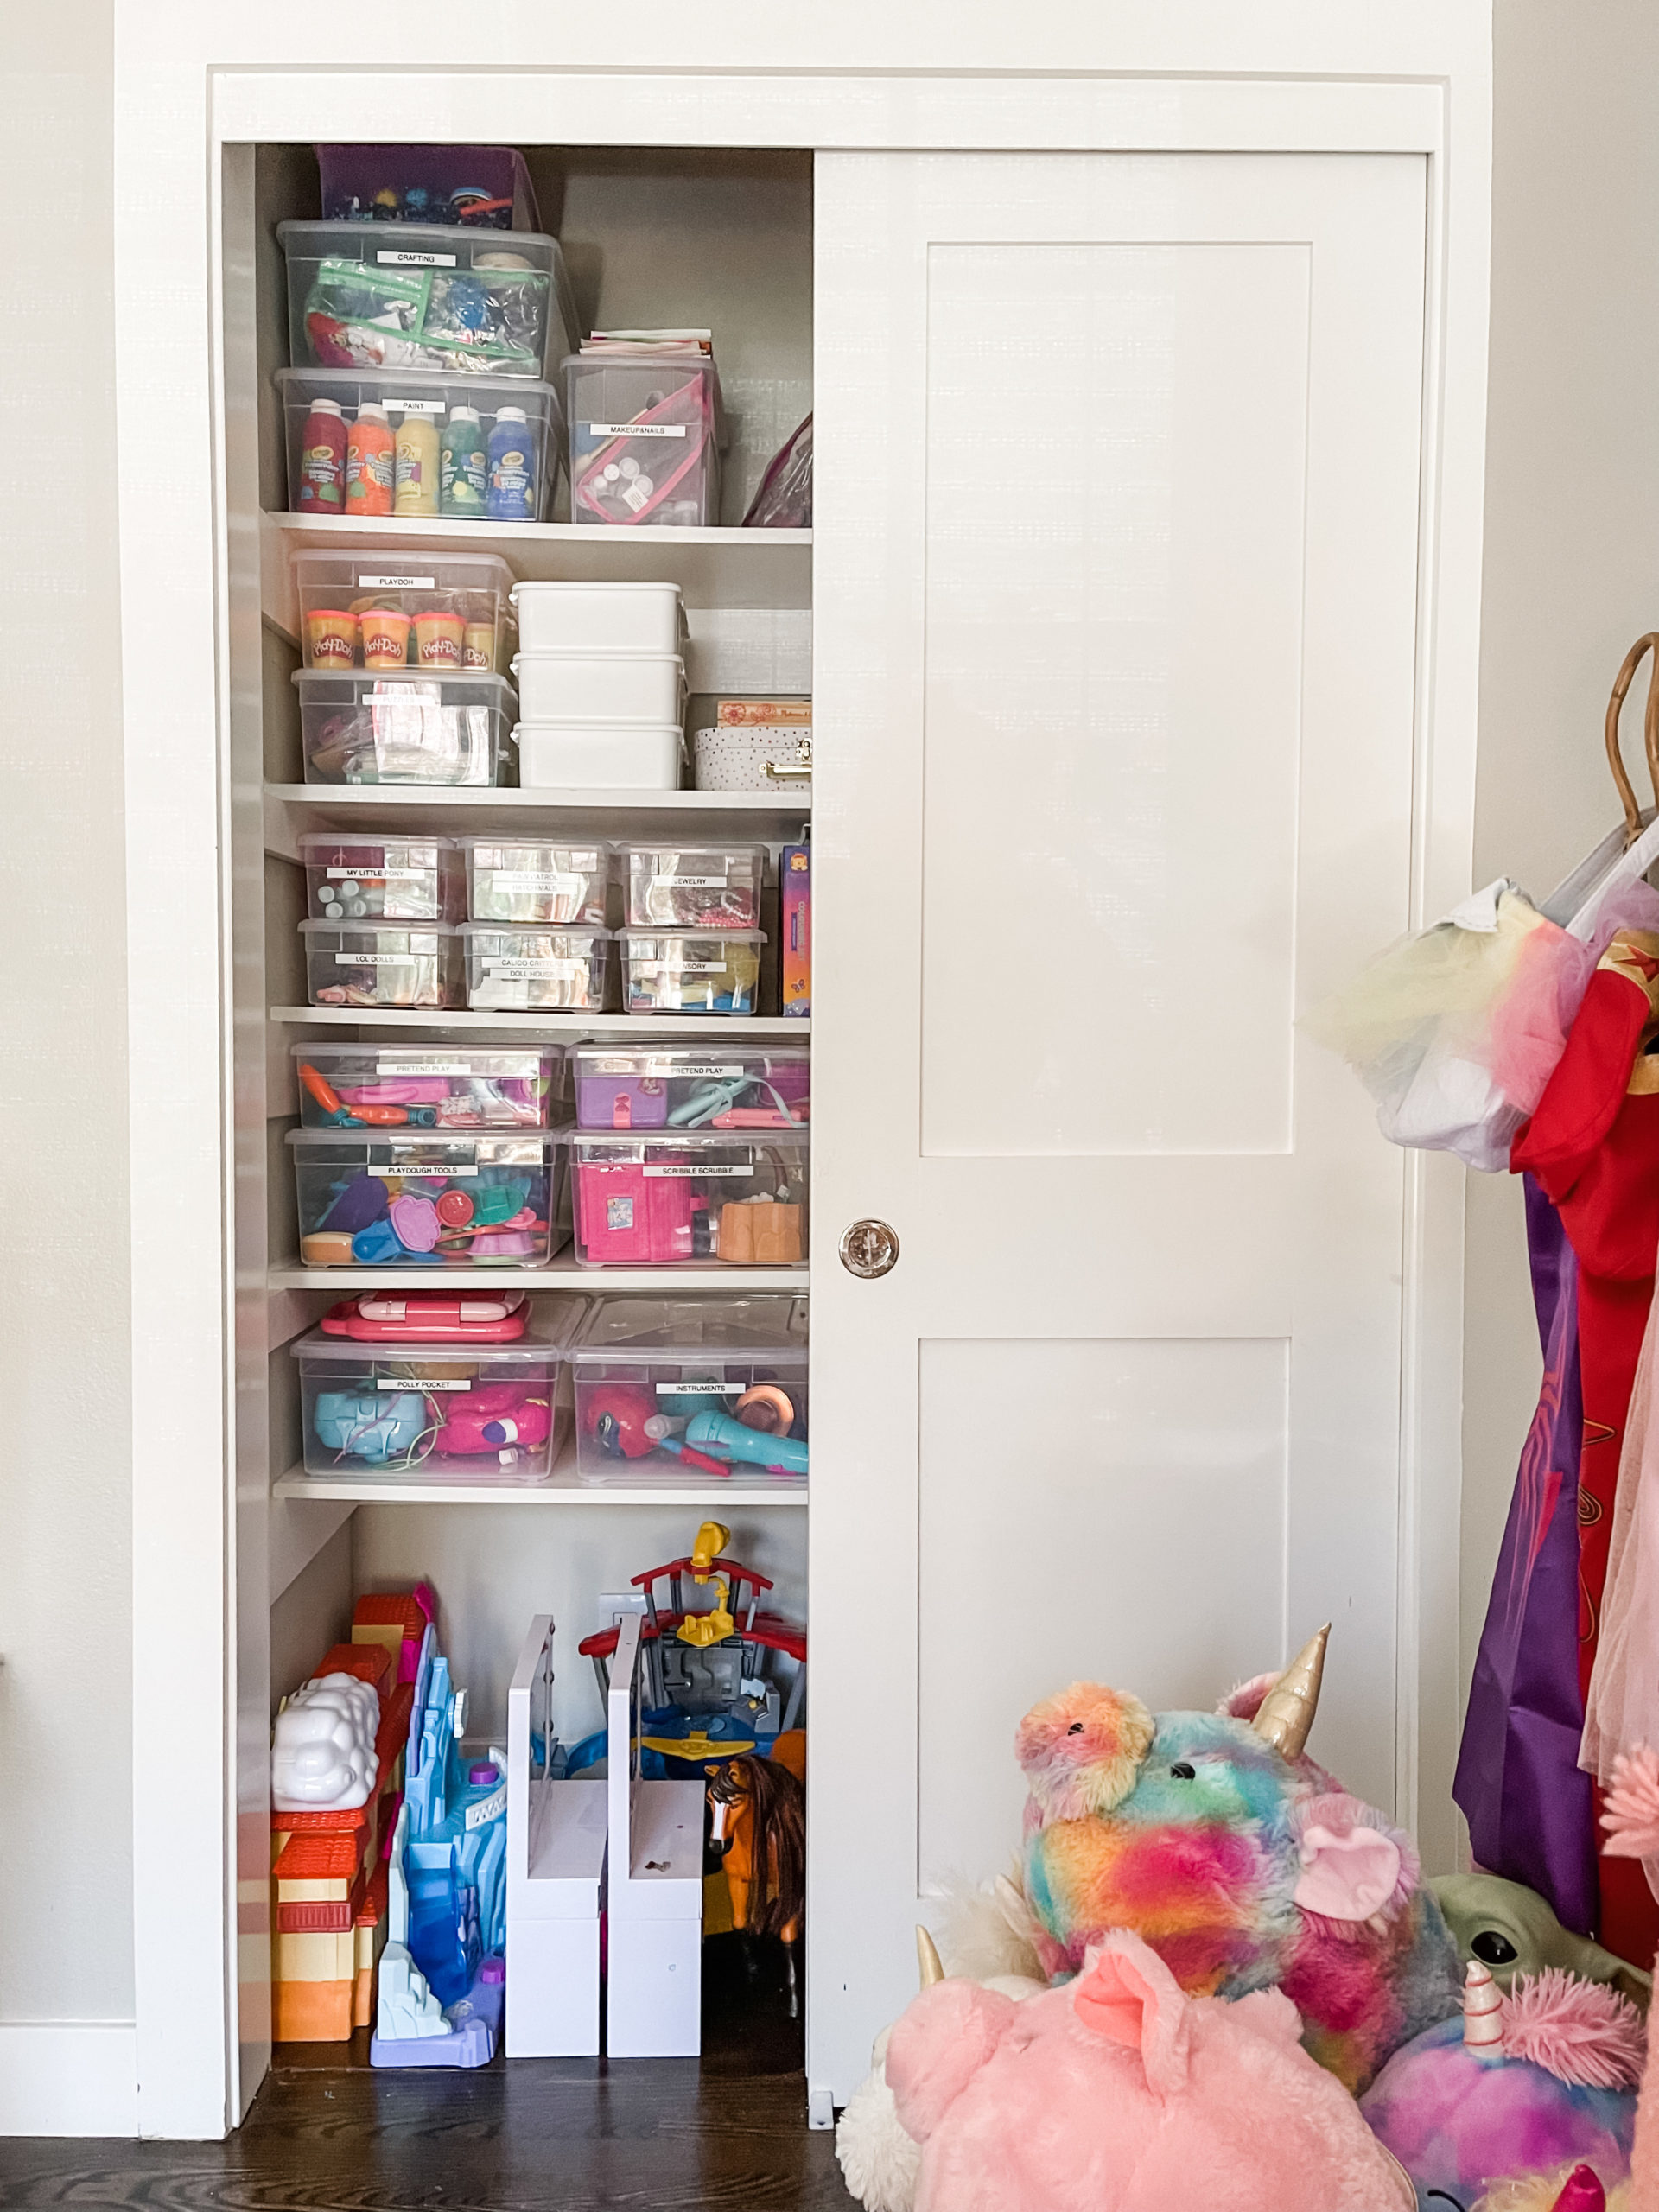
There’s SO MANY container options when organizing a playroom. No matter the space I’m working in, it boils down to the available space you have, what the contents are and what makes sense for their age. These two little girls are young – pre-school age and not even in kindergarten yet. So mom and dad are managing the toy organization as the girls will take time to learn how to clean up.
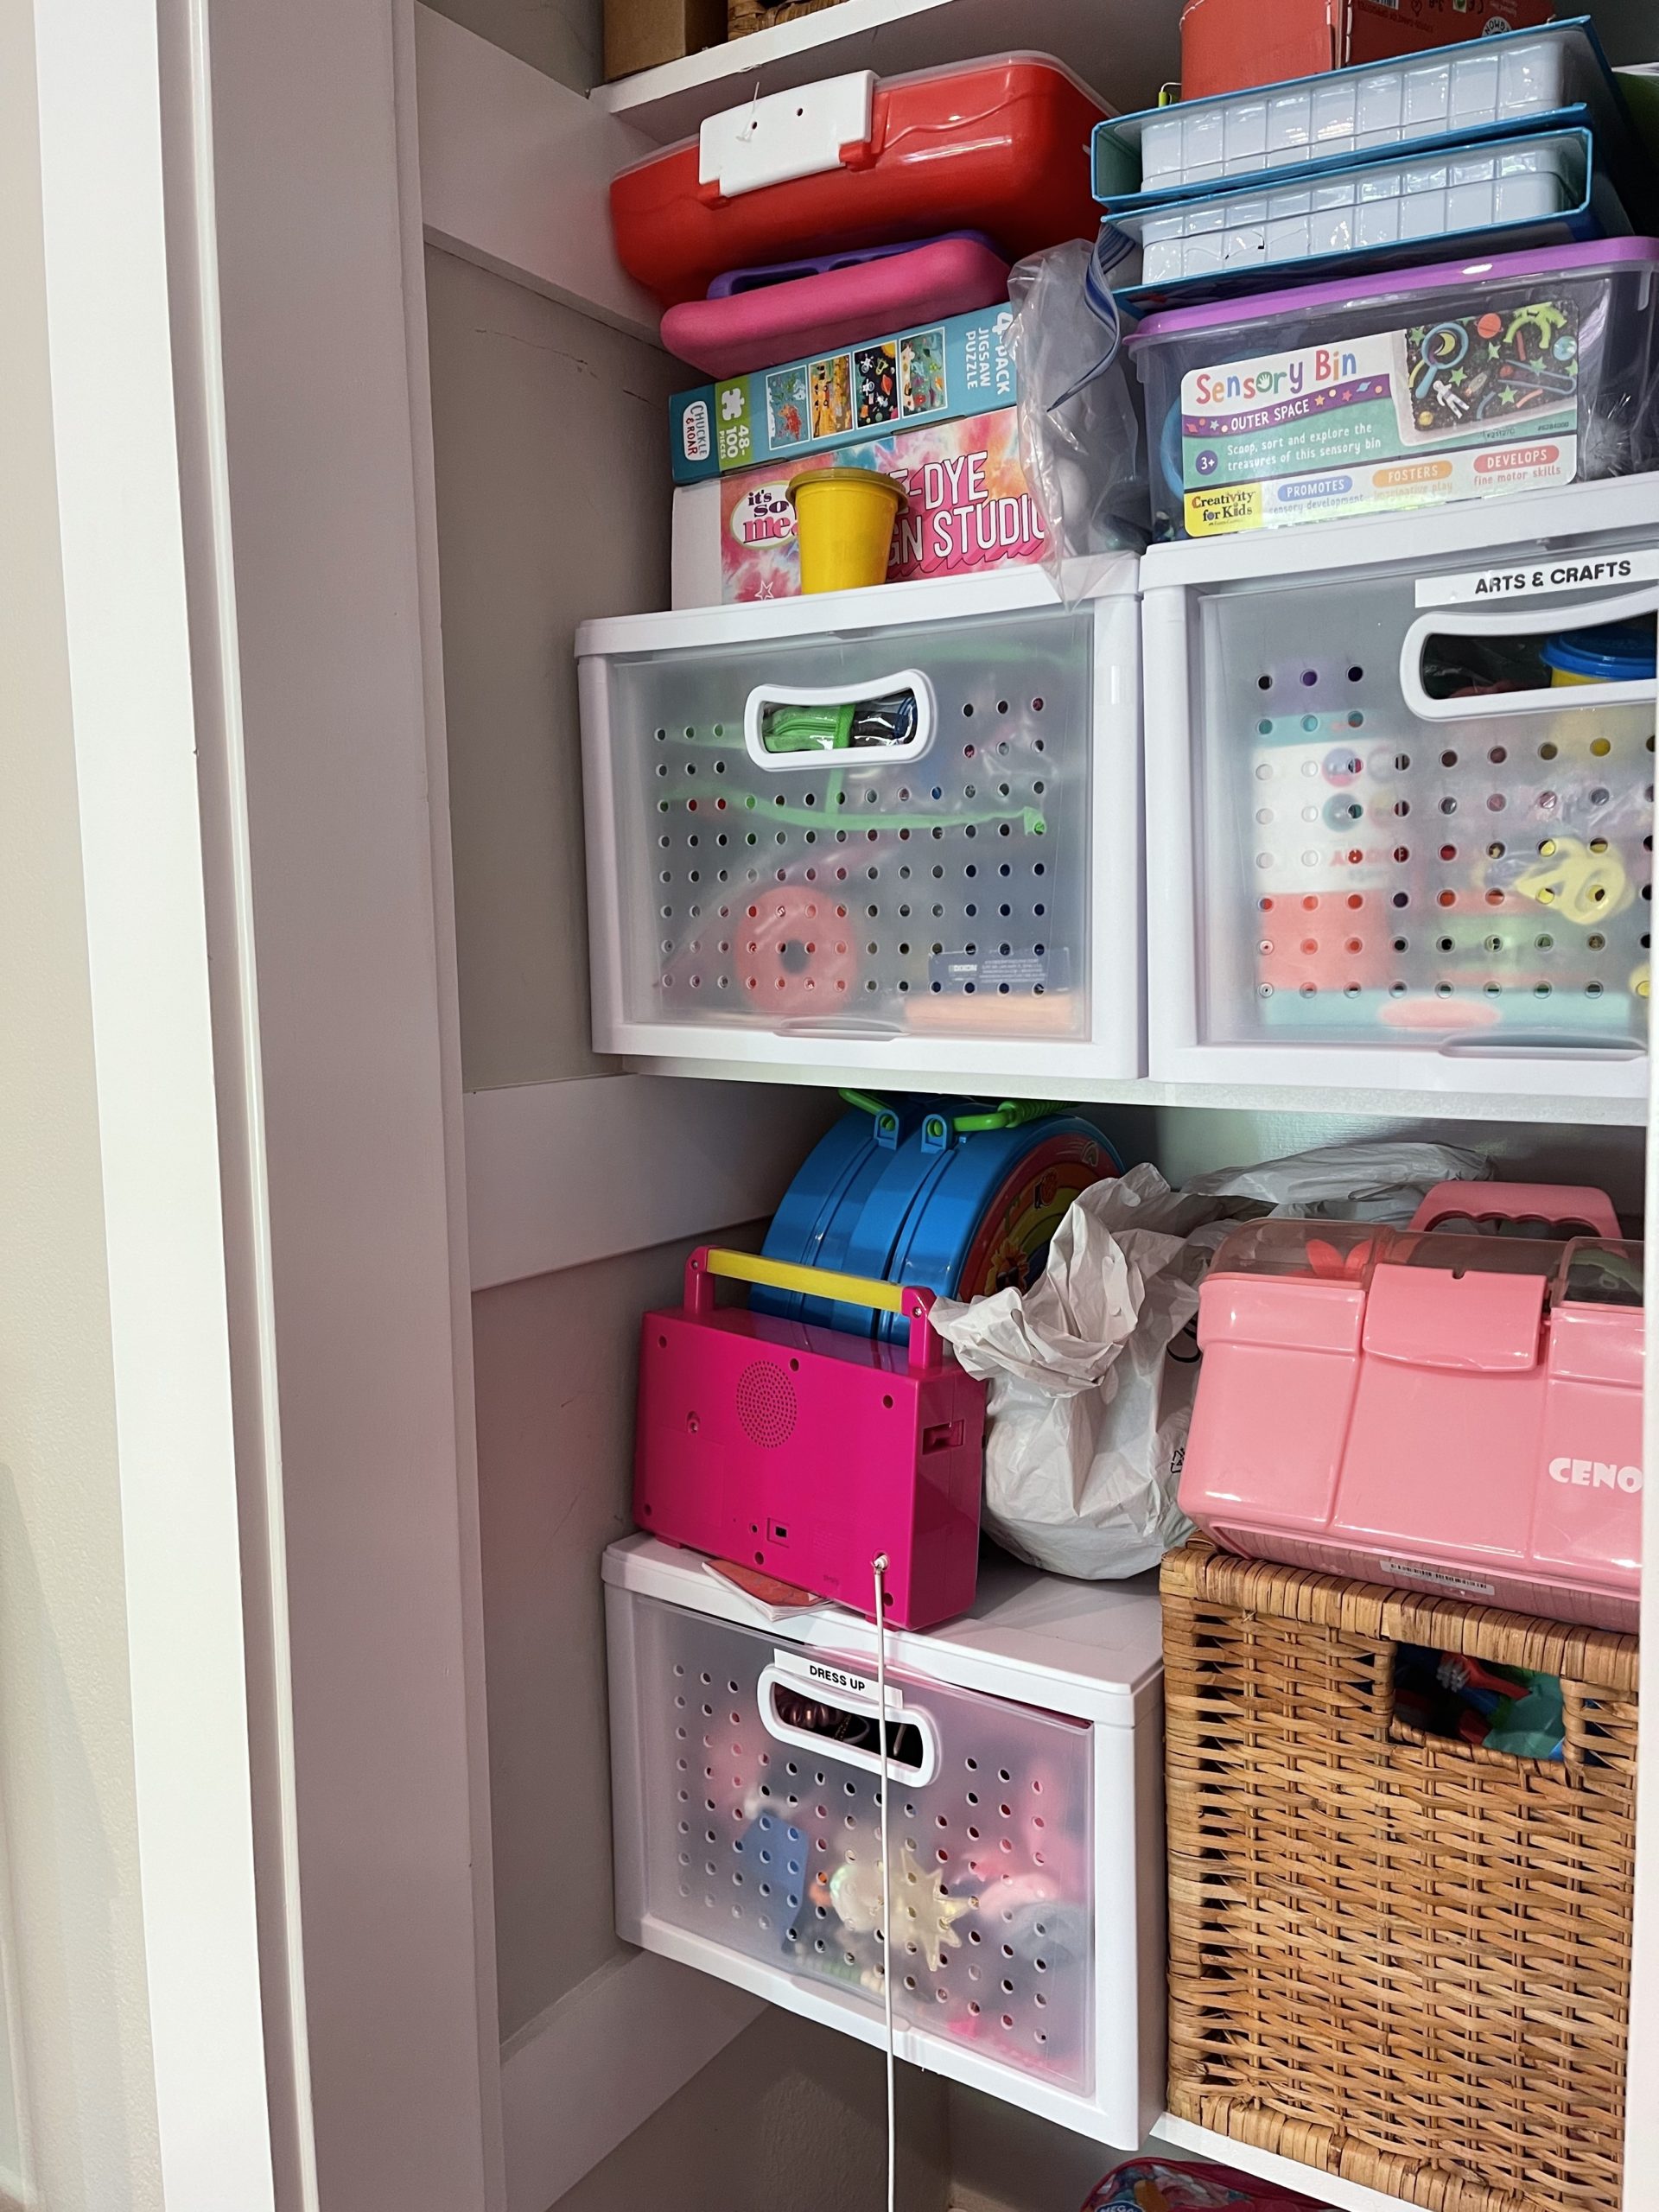
Sometimes containment with a lid works, sometimes not…in general, open-topped containers work very well for kids this age. But since we had access to a cubby system on the main playroom floor, we decided keeping the smaller toys and “messy” toys (playdoh, paint, etc) in lidded bins in the closet made the most sense for now. These are activities mom and dad are monitoring pretty closely so a lid works.
Sorry to add that much detail, but there’s truly SO much thought that goes into spaces like this. The end result has to work for YOU…not us.
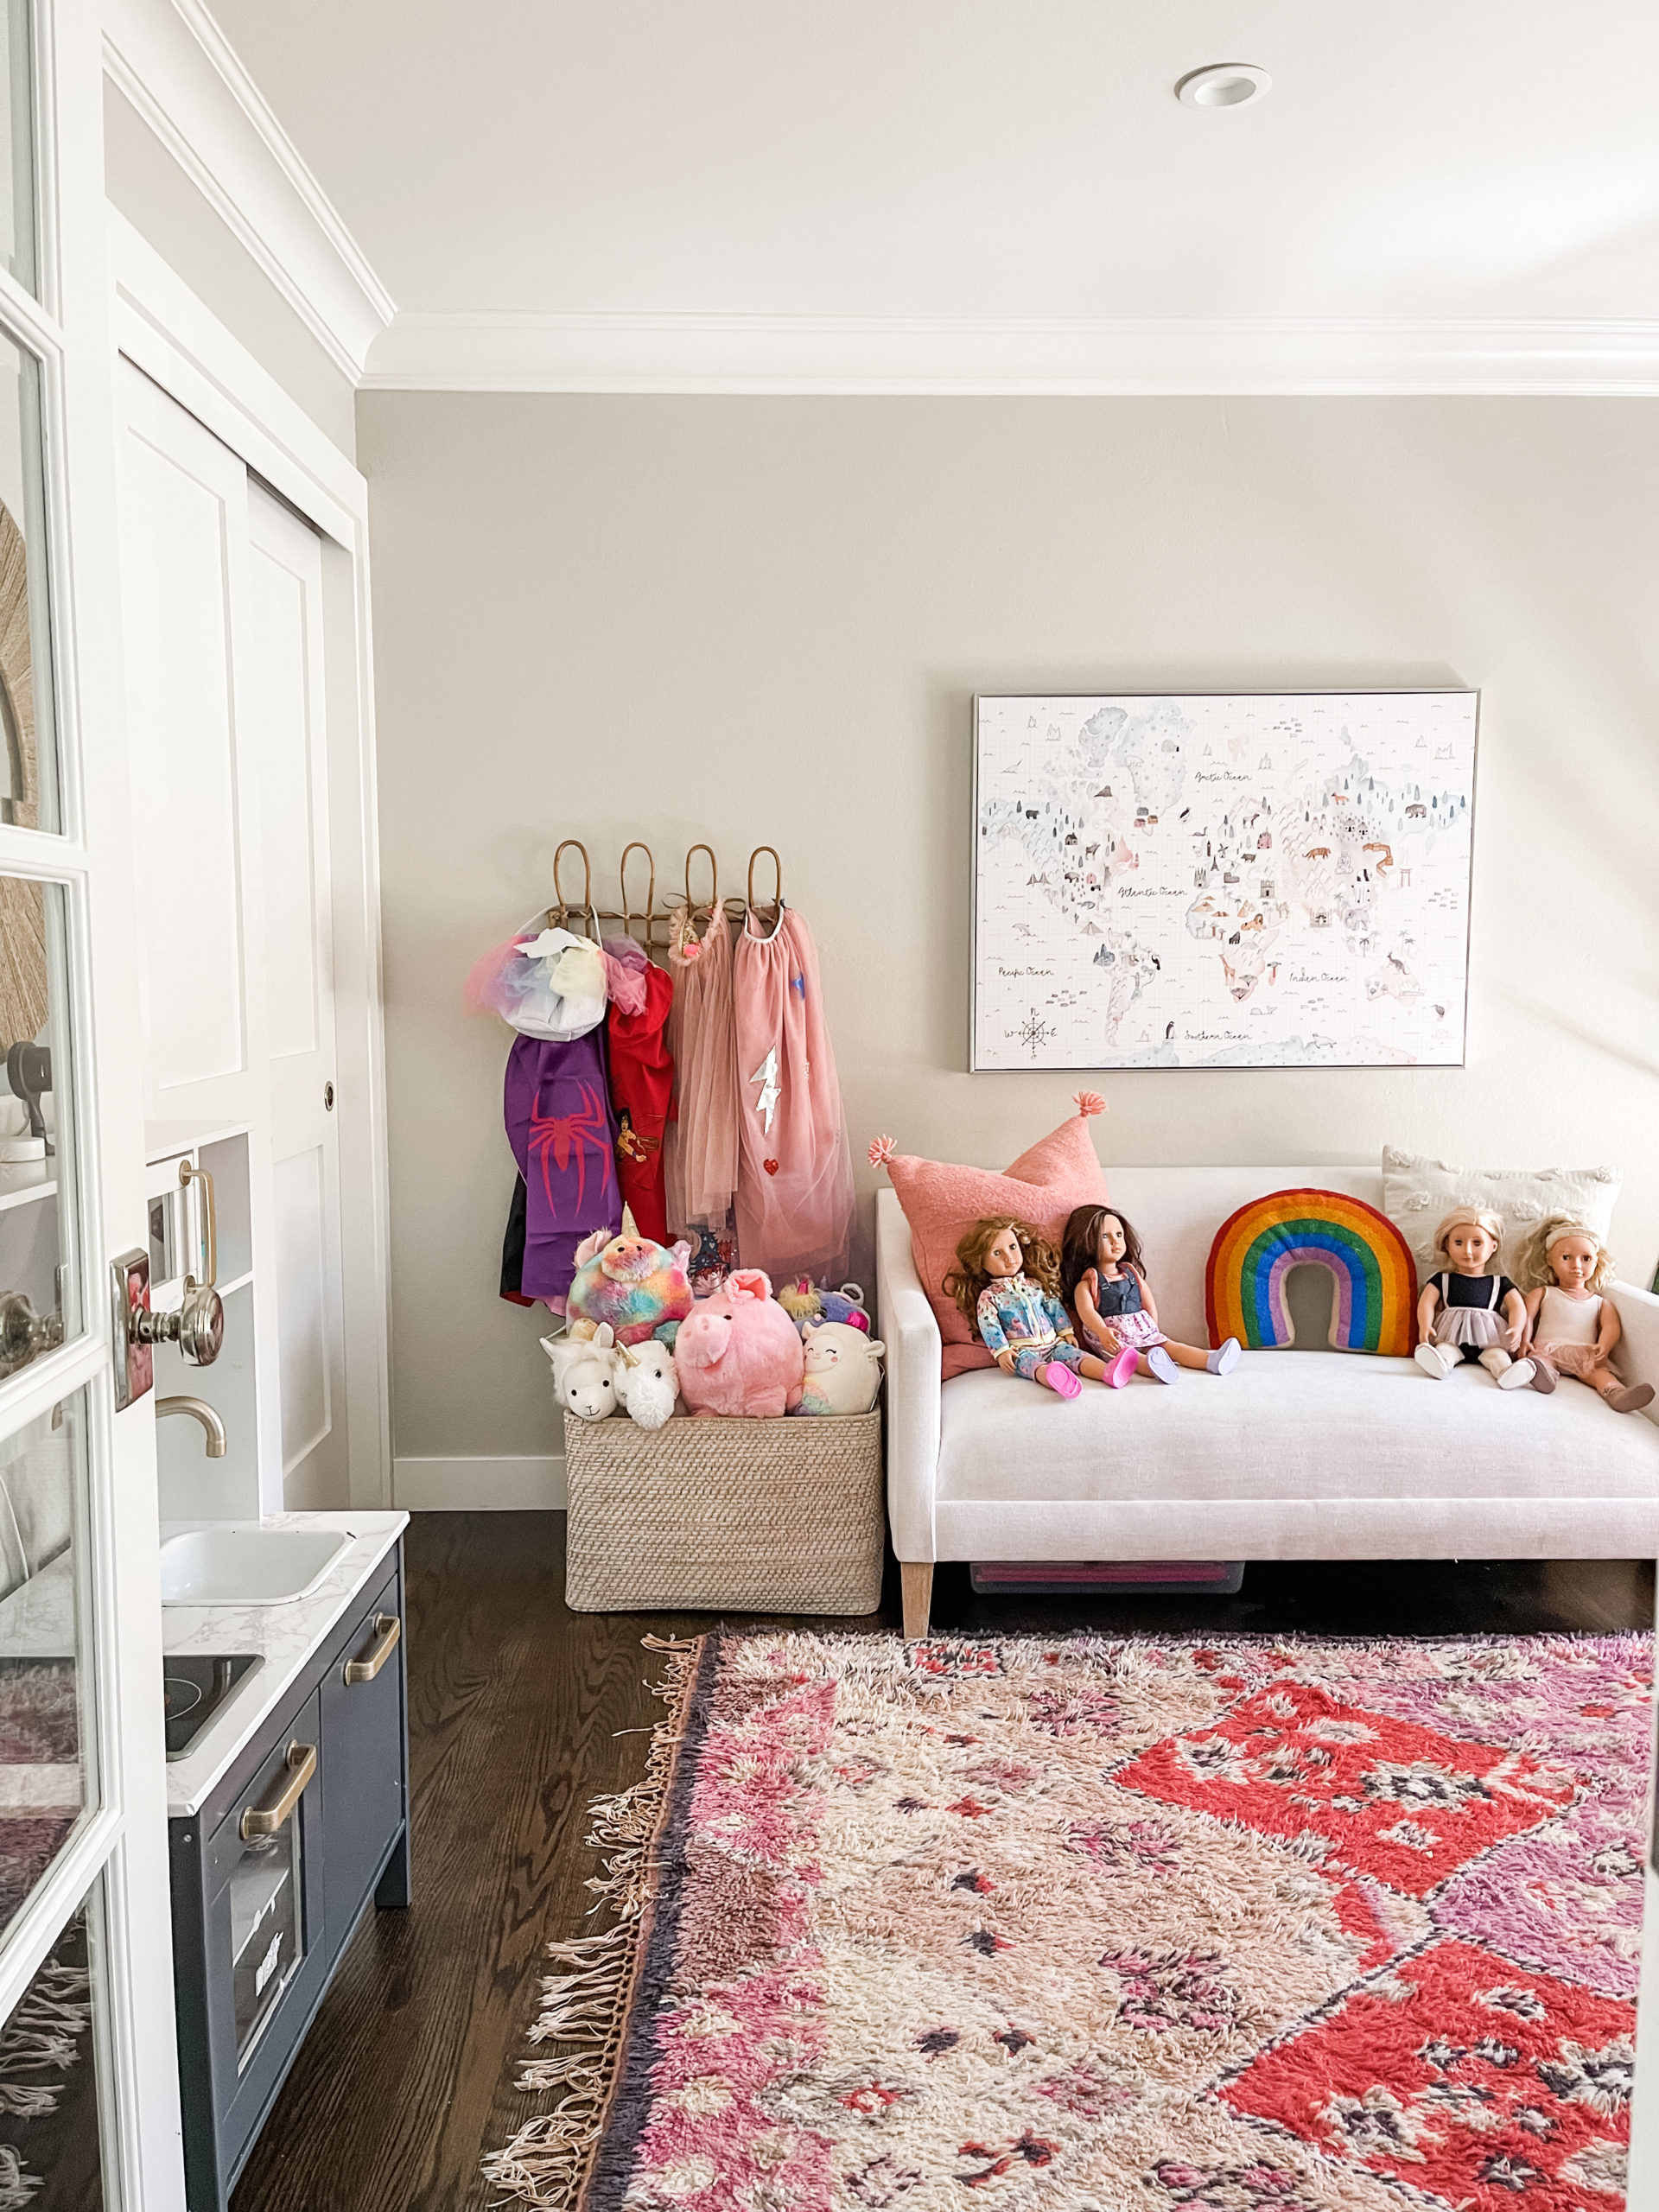
We re-purposed as much of their existing storage. I stacked two of the plastic drawers on the floor to organize dress-up accessories…
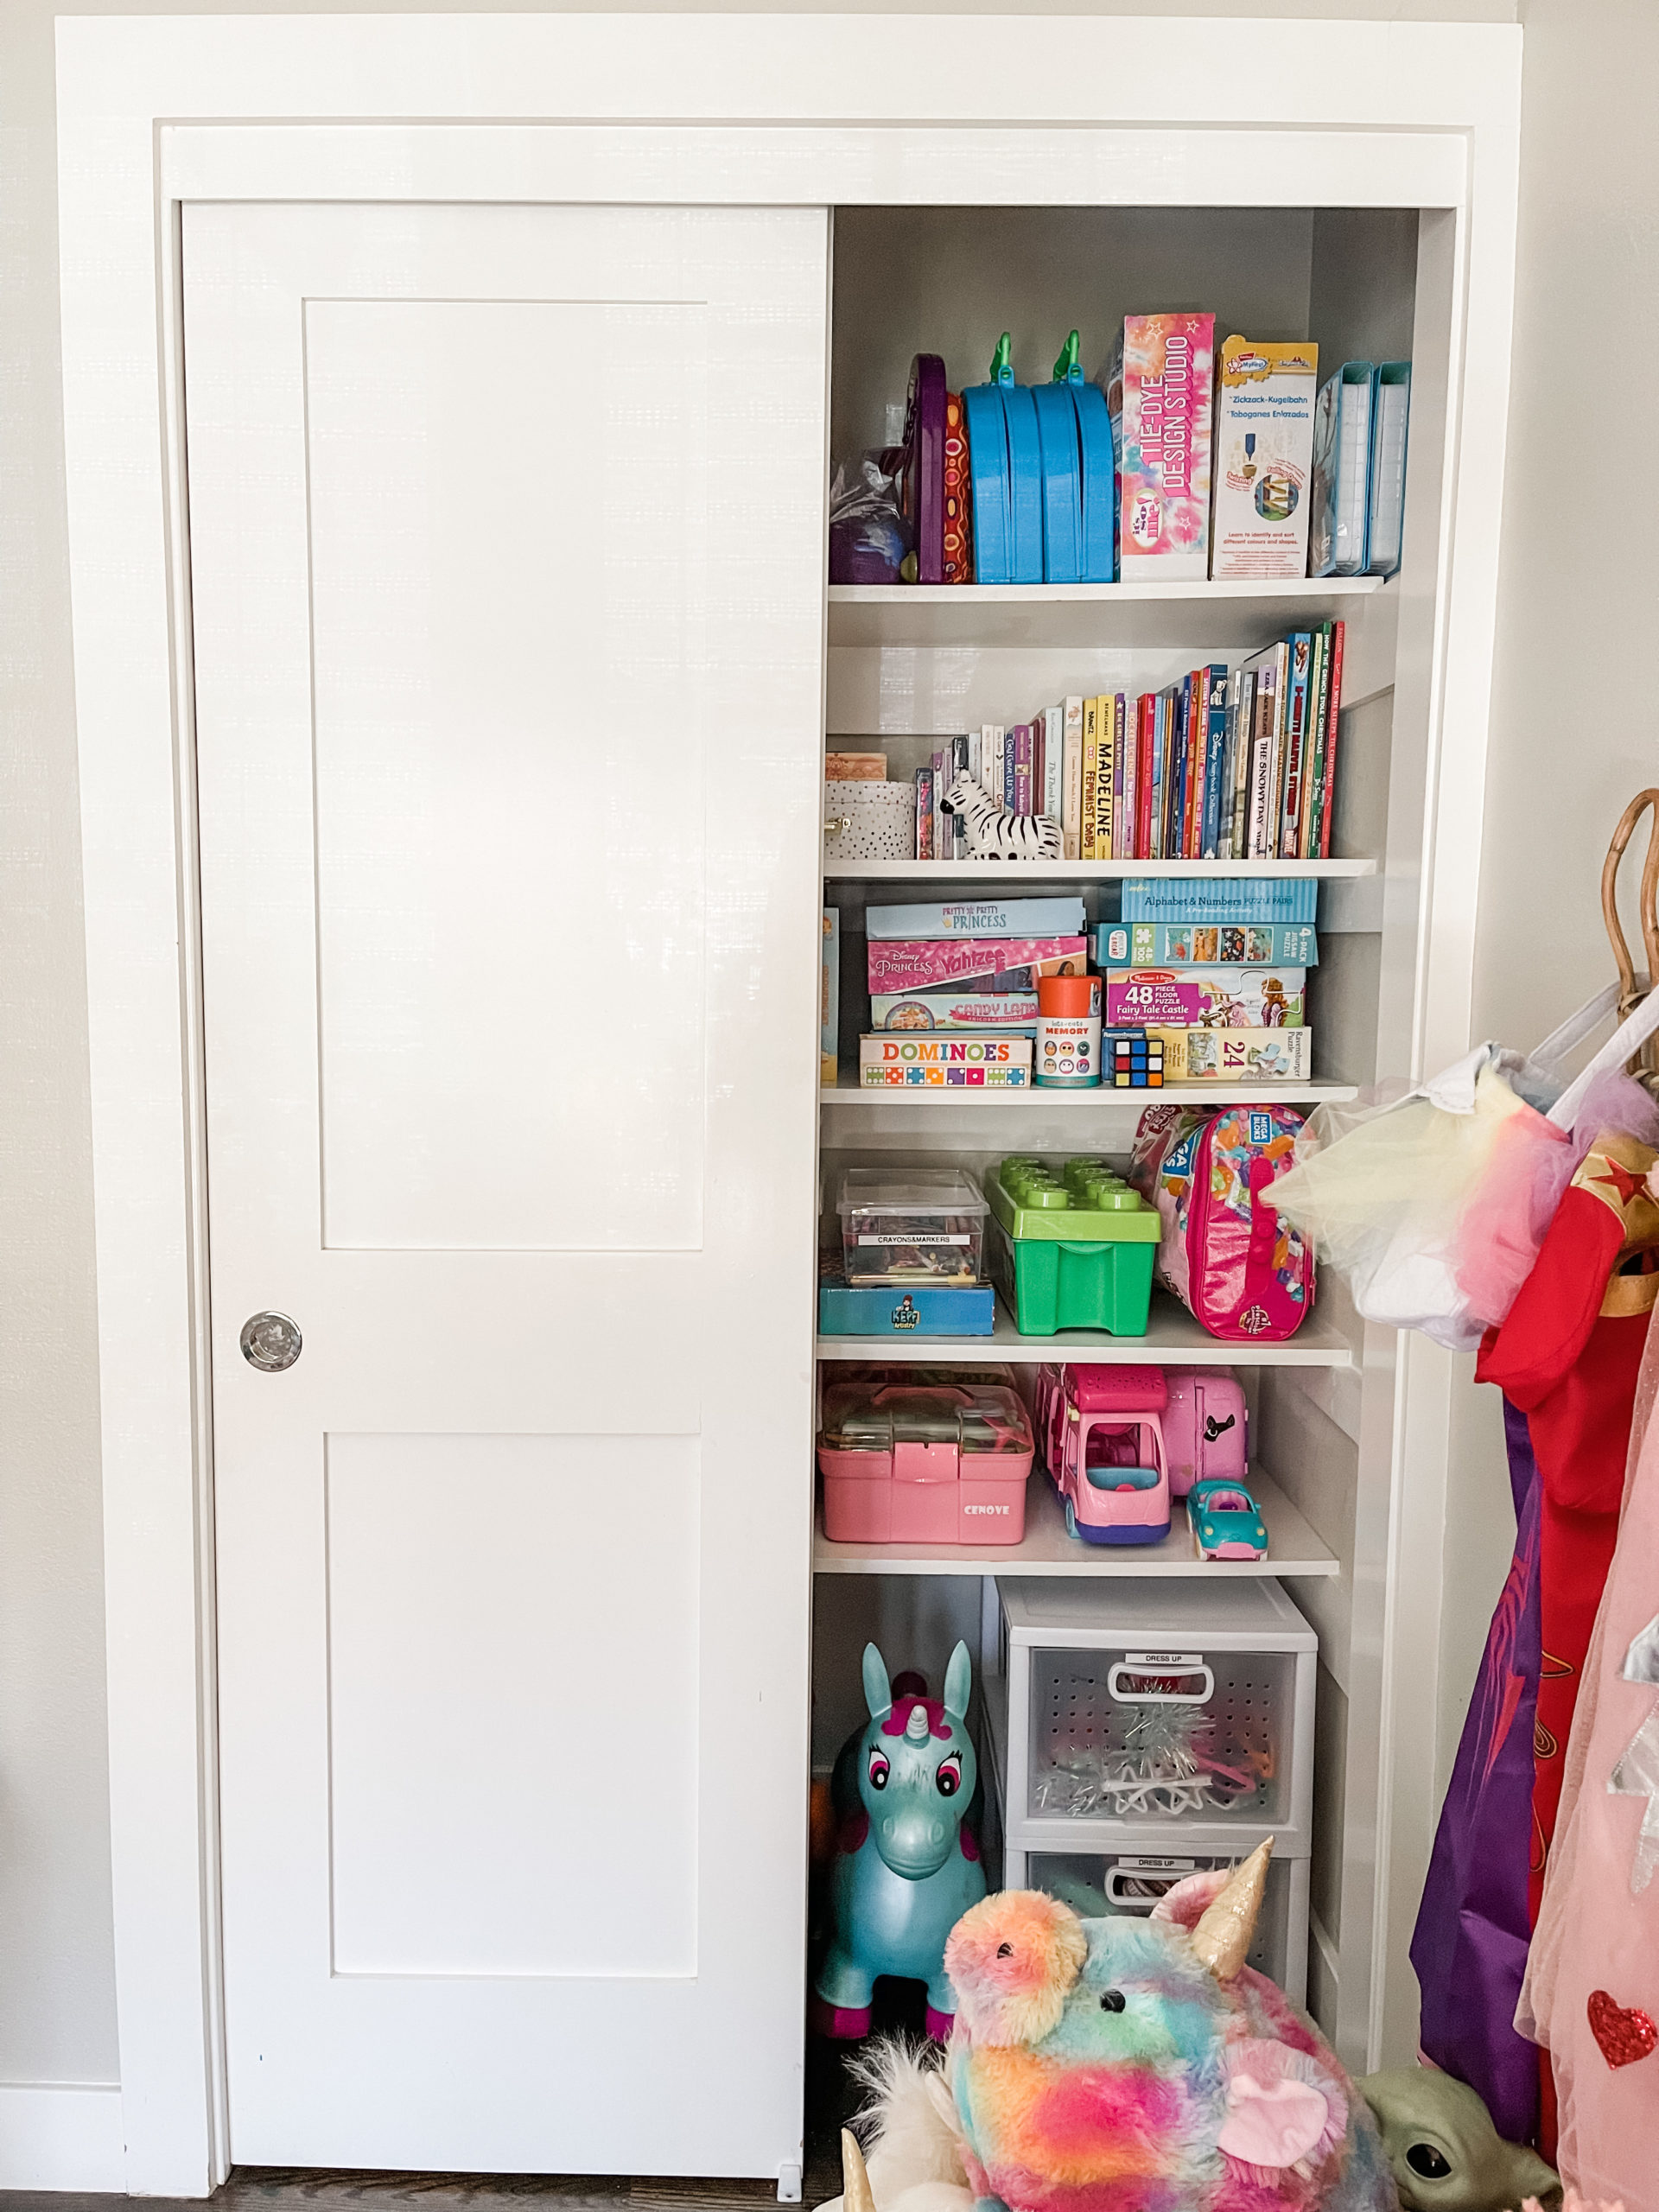
And we simply zoned the games, puzzles and books…no need for containers for items like these. Just huddle them together.
( bins )
We spent roughly $100 on containers PLUS the six labels on the baskets in the cubby system. Getting organized should never break the bank!
( cubby system | baskets | labels )
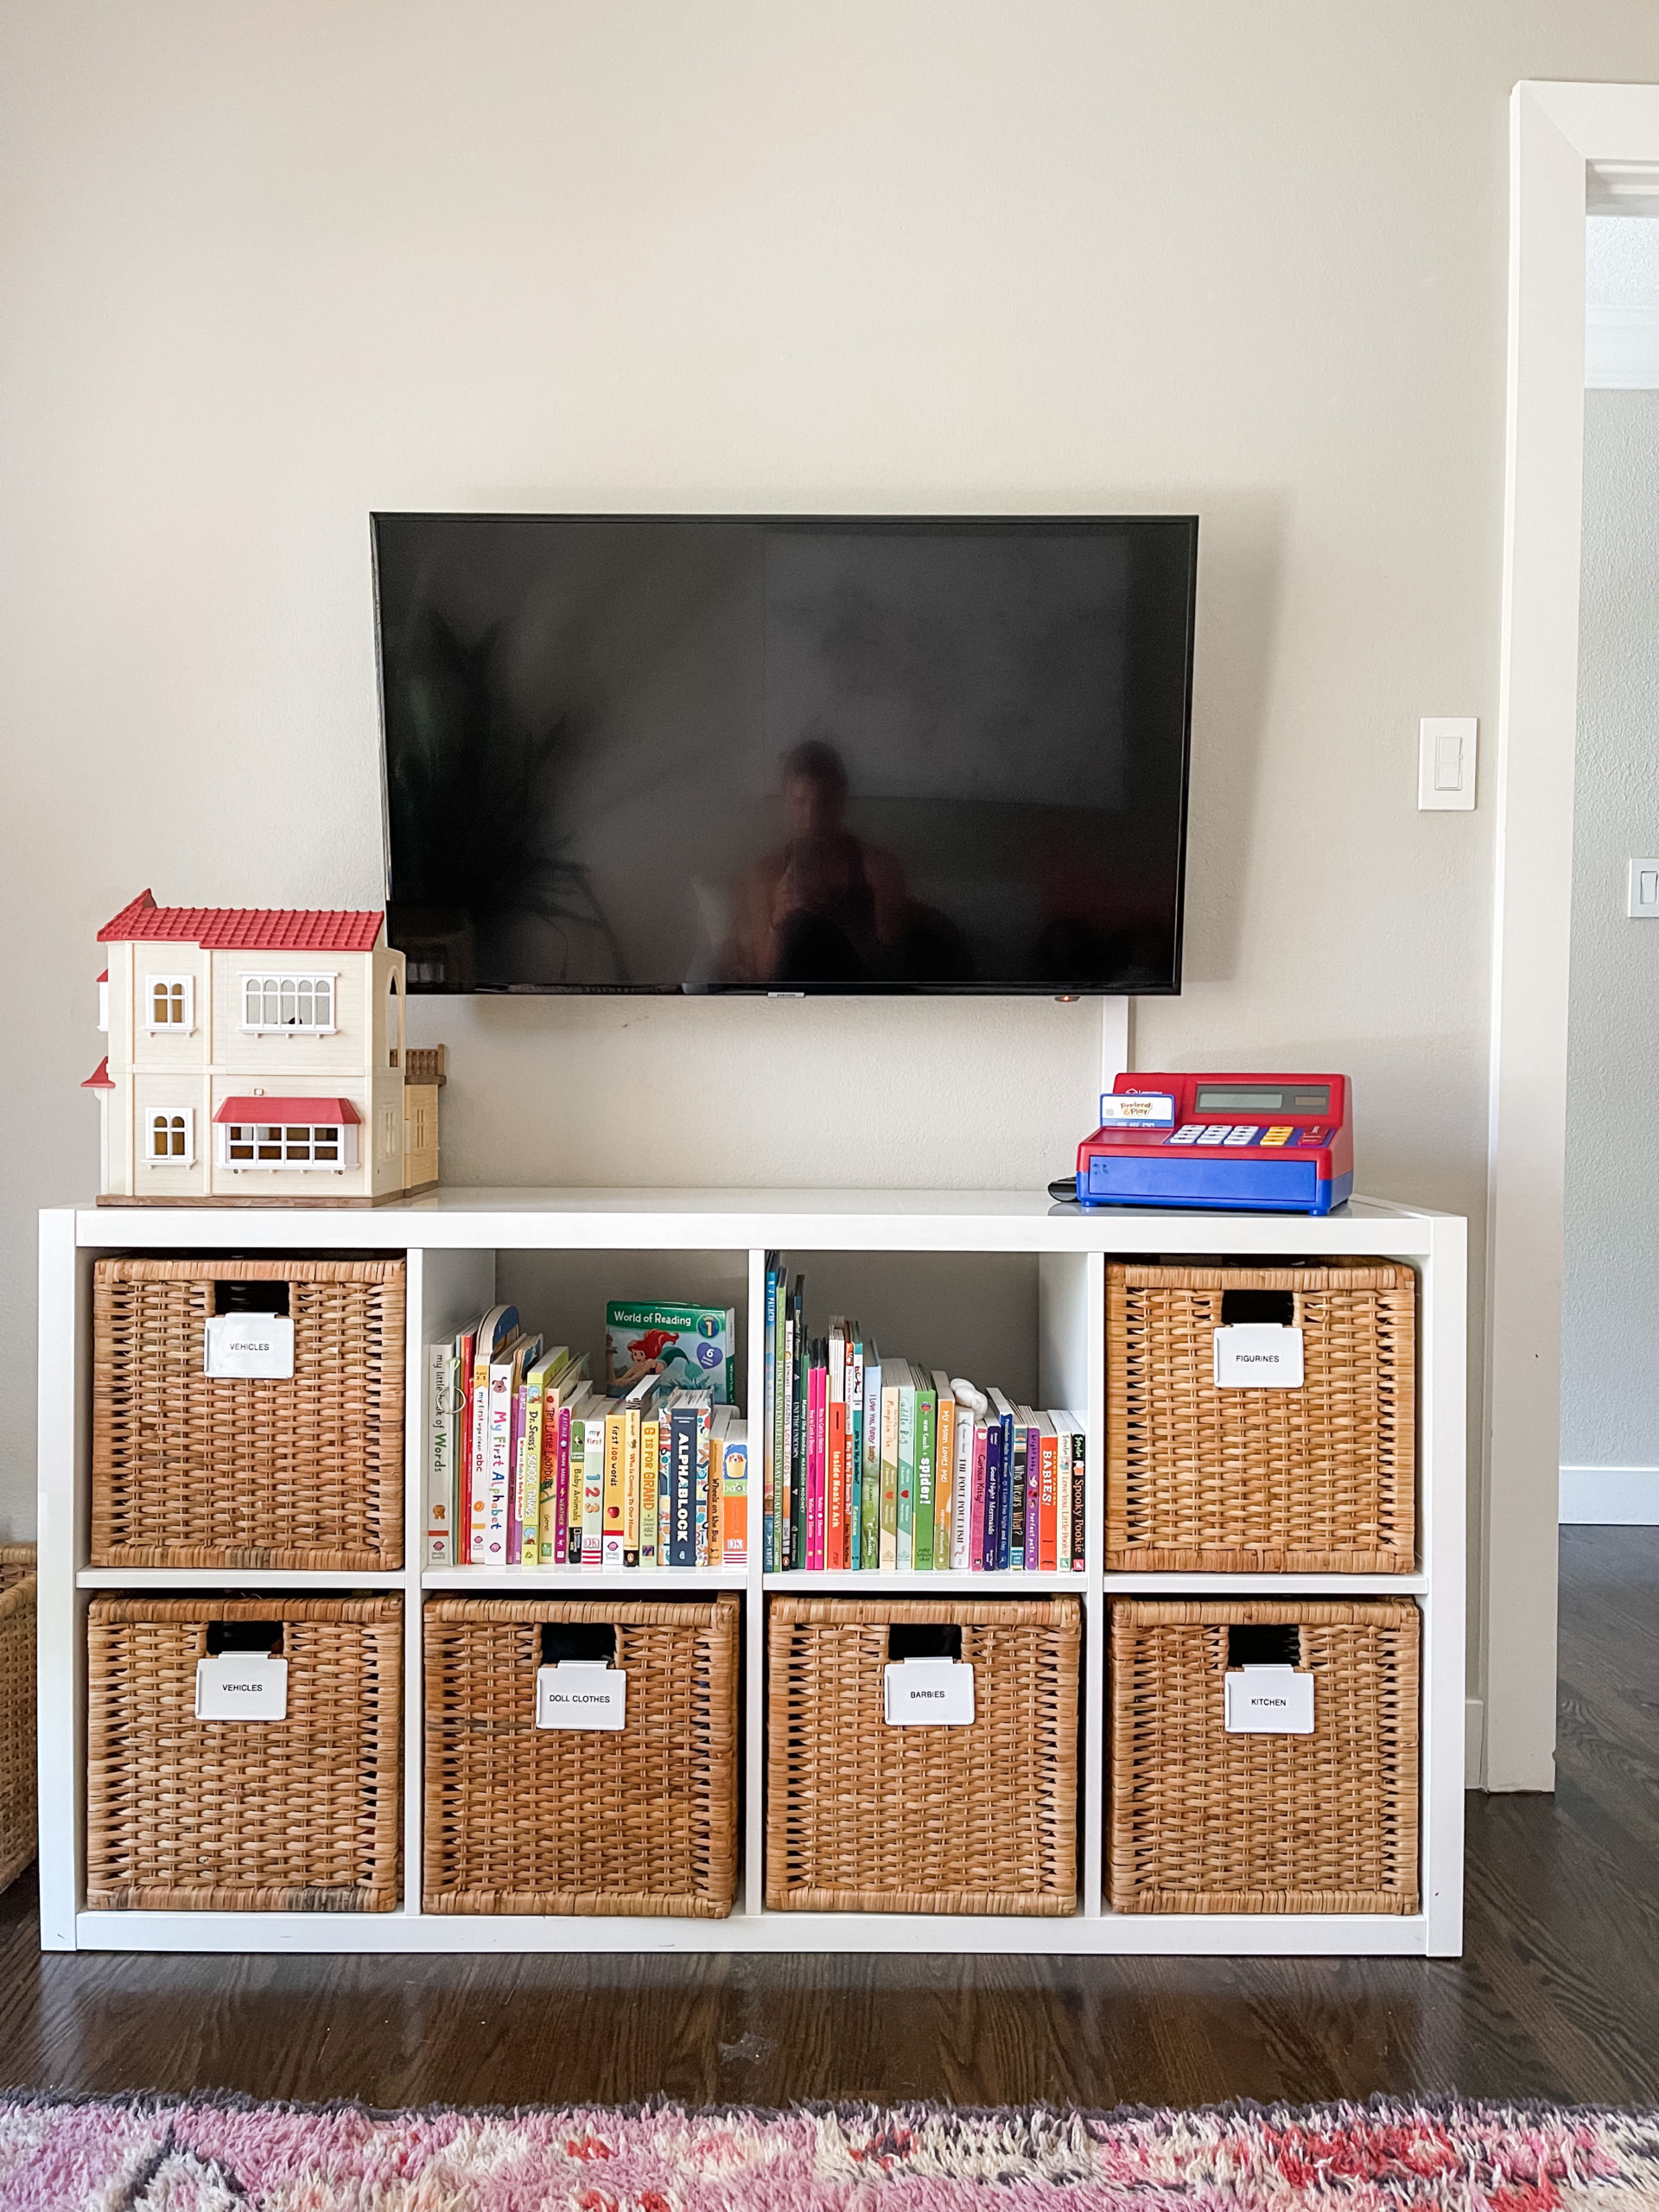
Originally, the cubby system had four baskets across the bottom and all of the books filled the top four cubbies. We moved out of season books to the closet to add two additional baskets, which she had on hand. These are the toys the girls are grabbing for most often.
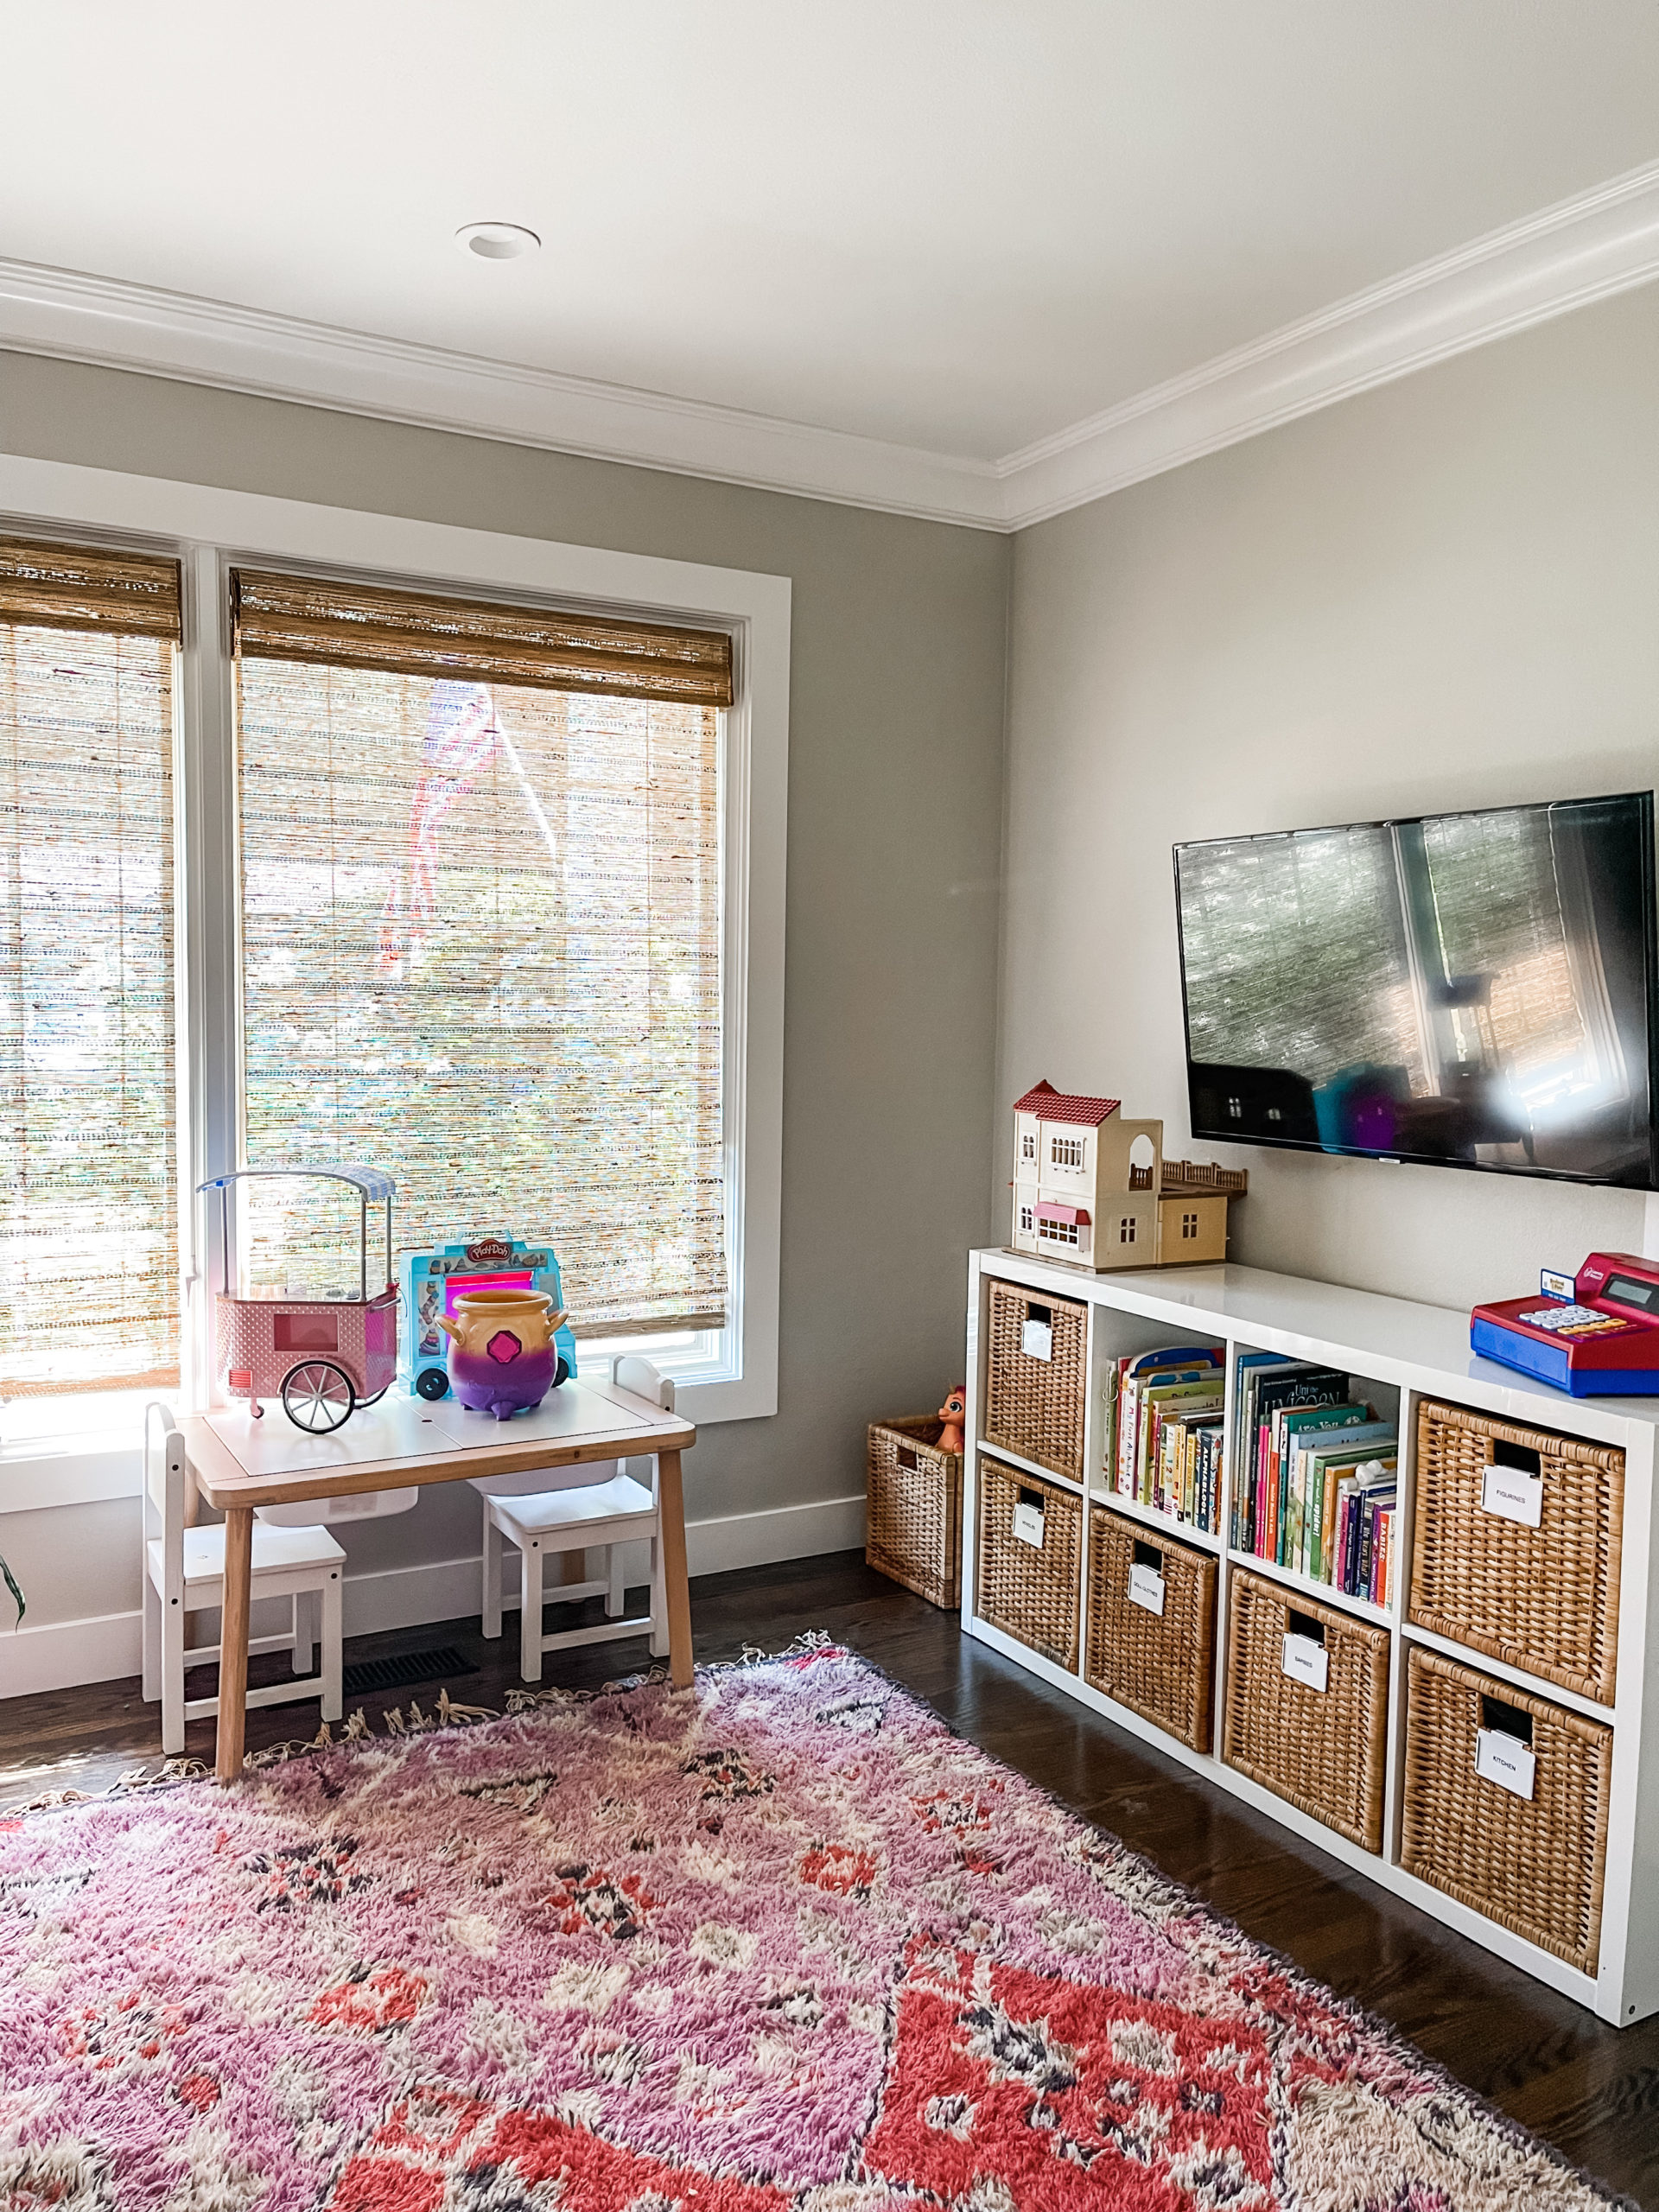
Otherwise, we space planned by using her existing floor baskets for stuffed animals and baby dolls…
This is the sweetest little playroom! I love how much light filters in…

Before you purchase containers, take a look at your overall space to see if adding shelves or more structure will be the best use of your money. In this case, adding the shelves made a huge difference.
Back soon with more guys…hope you’re enjoying the month!
xo,
Sam
What a great example of using mostly what you already own! I’ve tried to do the same over the last couple years and it’s been really helpful. Also, just using an empty cardboard box as a placeholder to see if the new “system” really works has saved me $$ as I’m transitioning some spaces.
Hi Shannon,
Such a great idea to use boxes first before buying anything! Love it!
Thank you for the comment! 🙂
xo