You’ve heard me talk quite a bit about Evernote this year. Between joining them for a live q&a in January and then becoming an Evernote Community Leader a few short months later…there’s been some chatter up in here about the platform. But now…now…we are finally digging into some simple how-to’s. And I’m starting with one very basic function that will simplify life…and blow your mind.
Web Clipper is essentially your “save button” for everything on the web.
I’m particularly excited about sharing Web Clipper because I know this is going to help SO MANY of you! No matter what you do everyday – a home maker, a blogger, an organizer, a business owner, a secretary, just love browsing online….whatever the case…this is going to make your work life and personal life a lot more organized. Digitally.
Once you have your Evernote account set up, all you need to do is add the Web Clipper to your browser. You can download and install in seconds right here. Once Web Clipper is on your browser, all you need to do is click the cute little elephant icon whenever you stumble upon something to save…
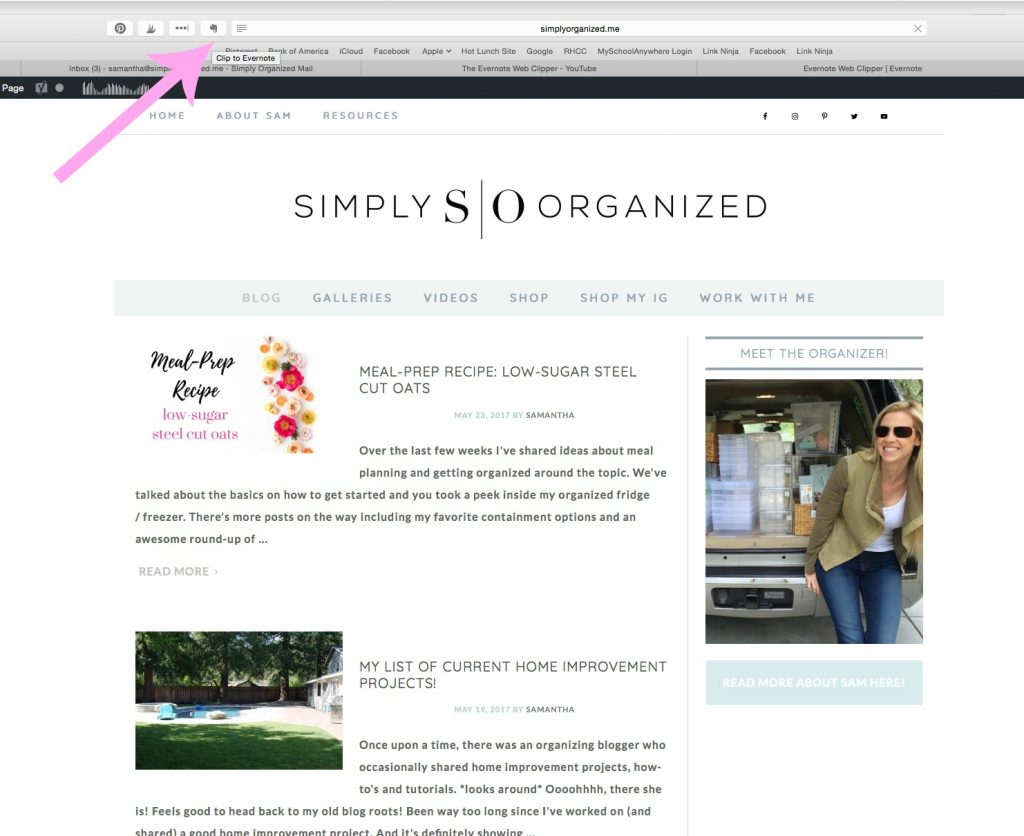
When you click the elephant, a menu box pops up…
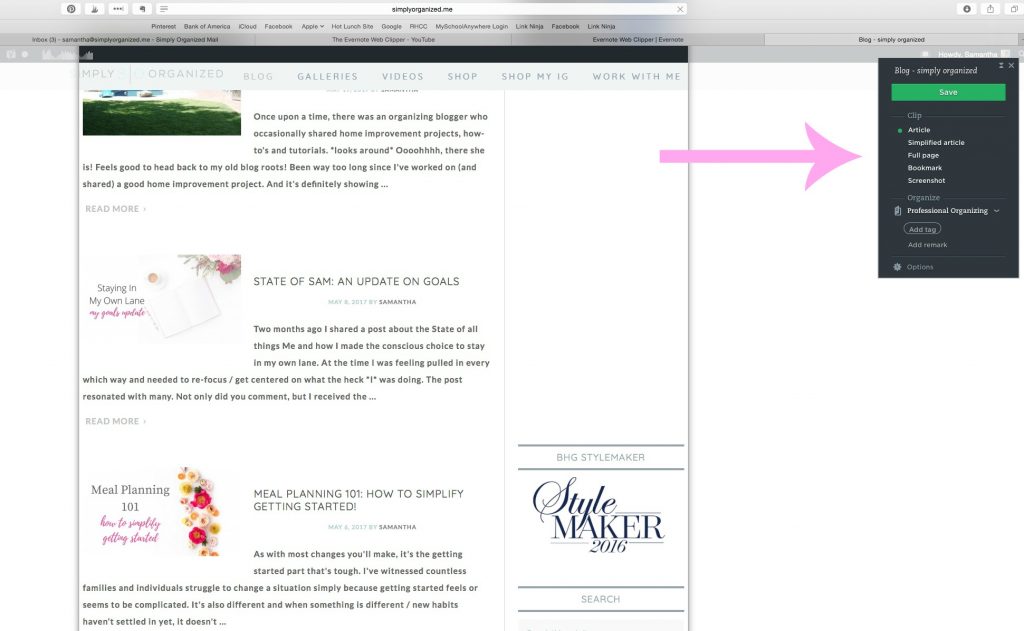
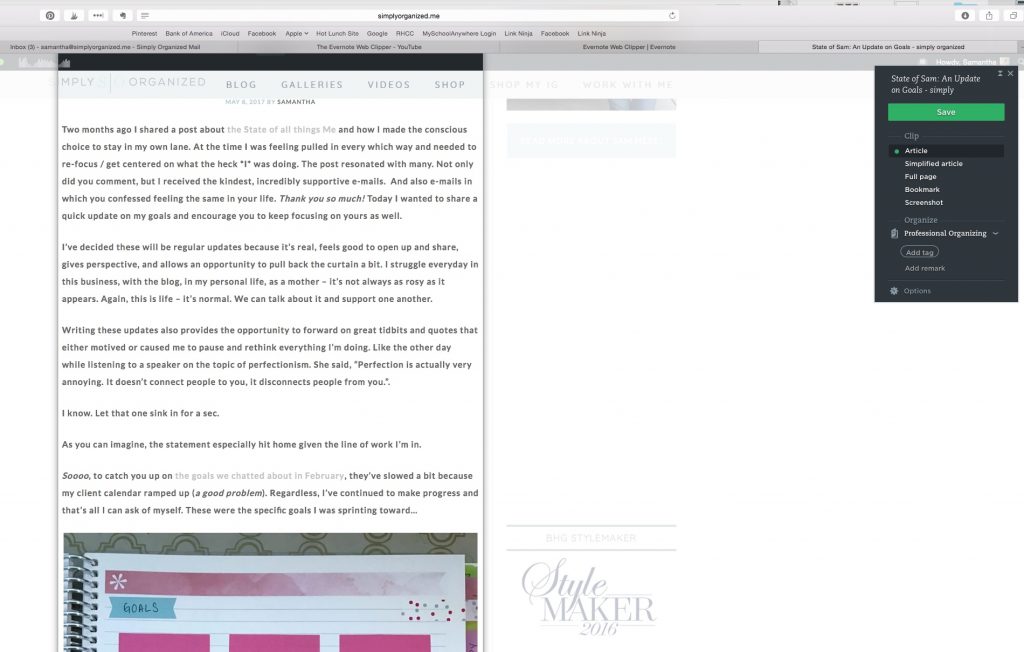
From there you have a variety of formats for saving. And this is what I love about the clipper. When you find something you love and want to reference again, you probably don’t want to see all the ads or blog sidebar type stuff. Yep, Web Clipper removes it all! You can save it as an ARTICLE which would look like this…
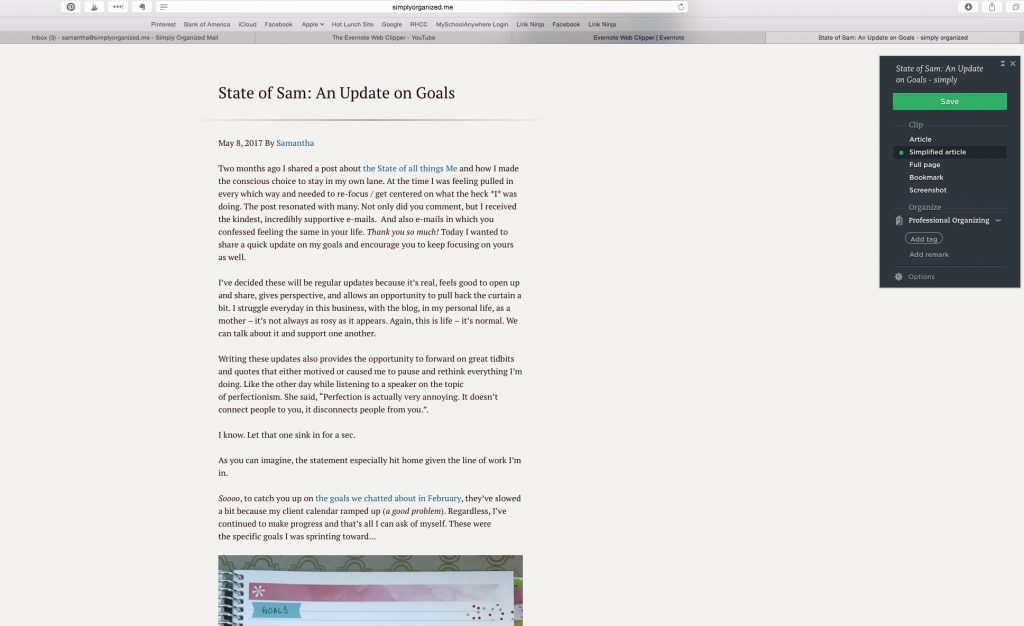
As a simplified article, where the website header and other details have been removed…
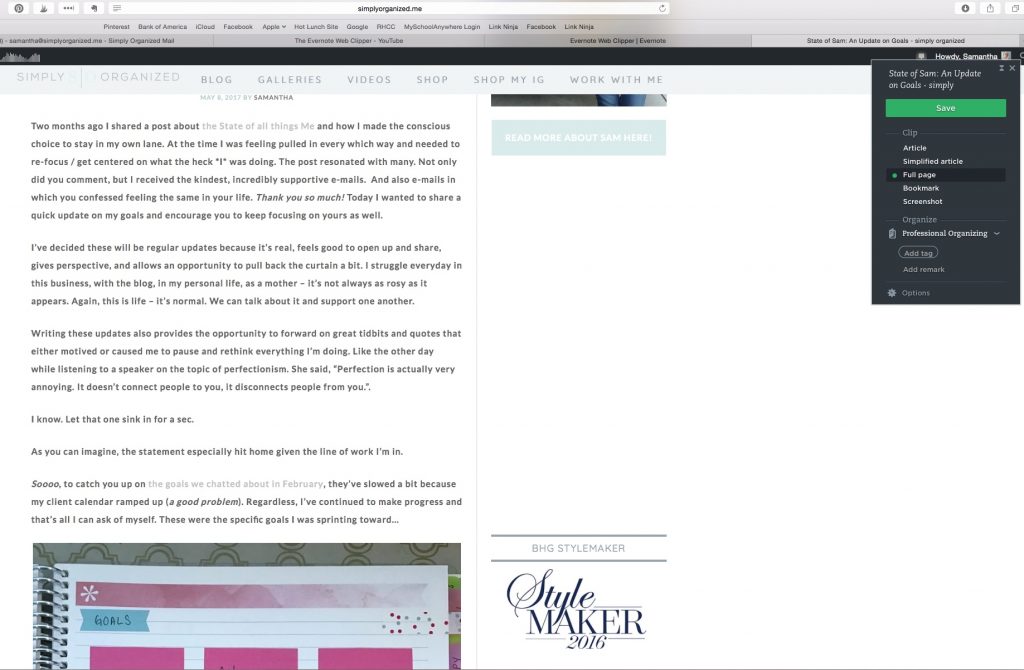
You can save it as a full page…
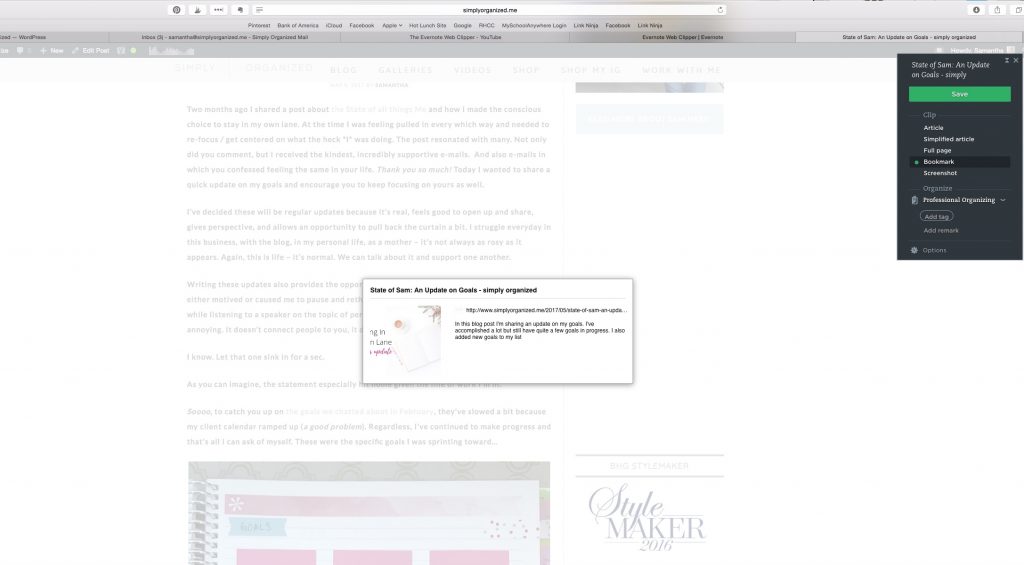
You can save it as a bookmark…
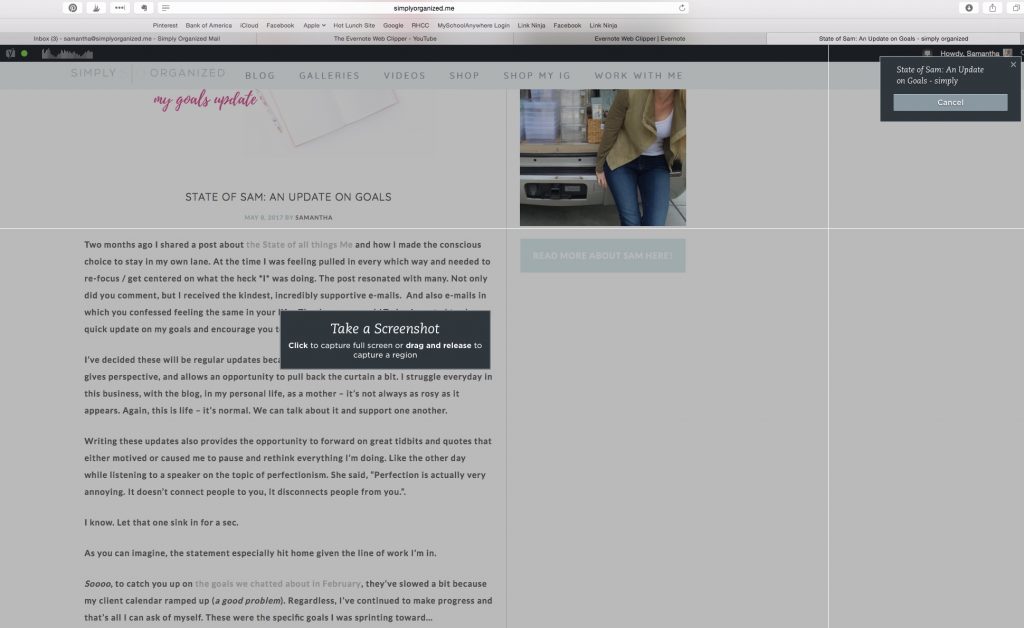
Or you can take a screenshot of a portion of the page you’d like to save…
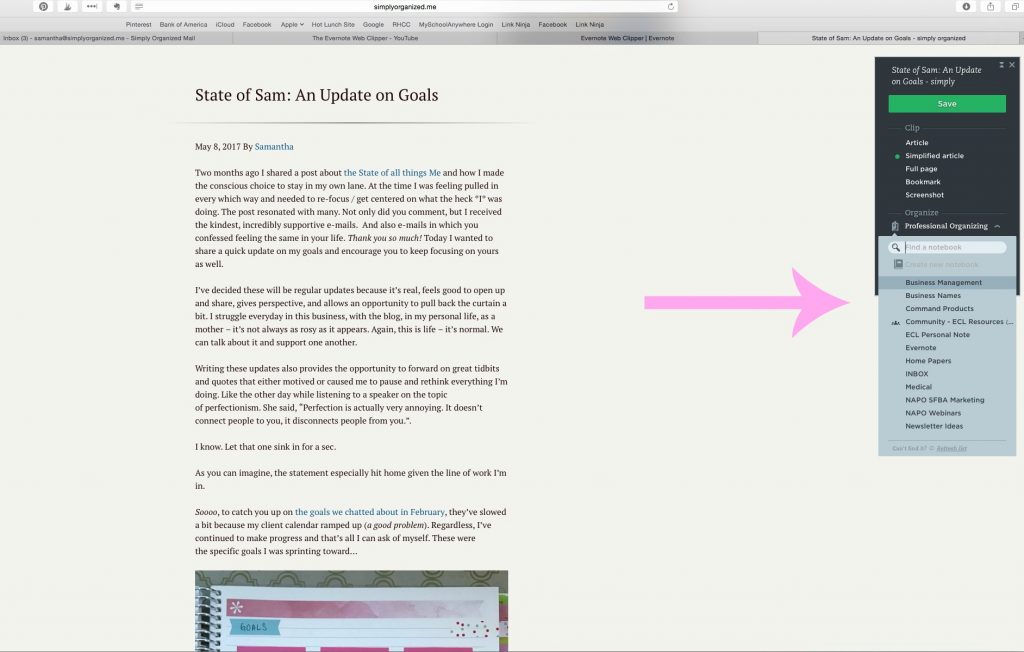
In this case, I’m going to clip this blog post as a simplified article. Then, I just need to tell Evernote where to save it. If you already have notebooks set up in your account, you can choose one from the drop down menu. Or create a new notebook right there on the spot. Think of your “notebooks” as your “file folders”. You can also send it to your Inbox to sort out later. Your Inbox can act as a holding place until you have the time to think of a specific notebook name. Then the next time you’re in Evernote, you can move it to another notebook….
Tags are what really make Evernote unique. No matter where you save something in Evernote, as long as you tag it, find is simple. For example, I’d likely tag this article as “goals”. Then later when searching for this, I can search by the tag “goals”. I try to keep my tags as general/simple as possible…but you can make them more detailed if you wish. By a person’s name, a project name, a room / space, a meal of the day (breakfast, dinner, etc)…whatever you want! And most importantly, whatever makes the most sense to you so that you can reference / locate it. Add as many tags as you want!…
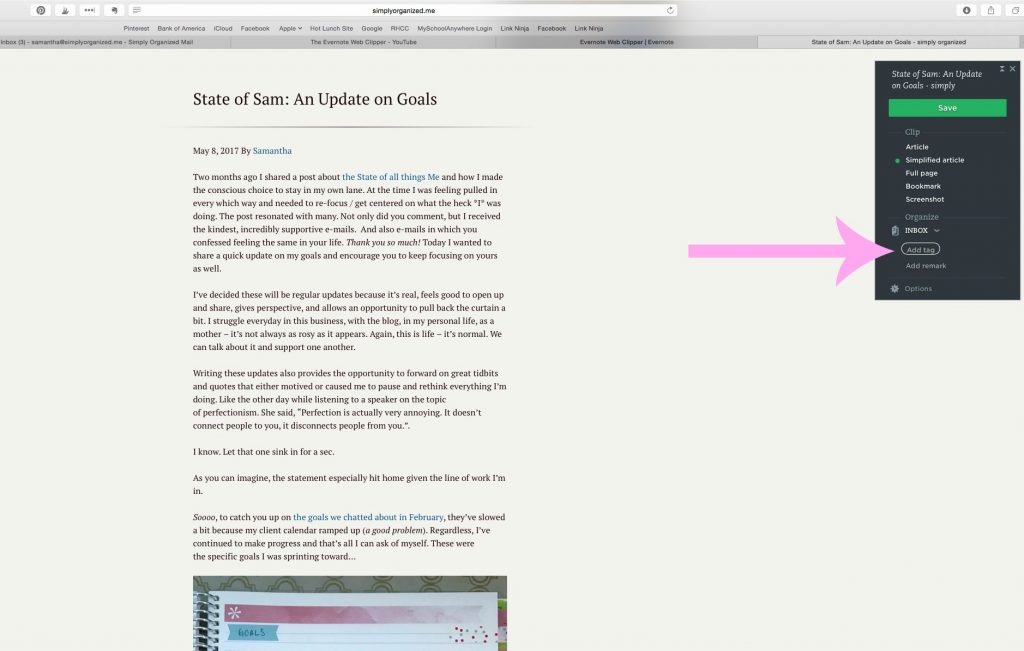
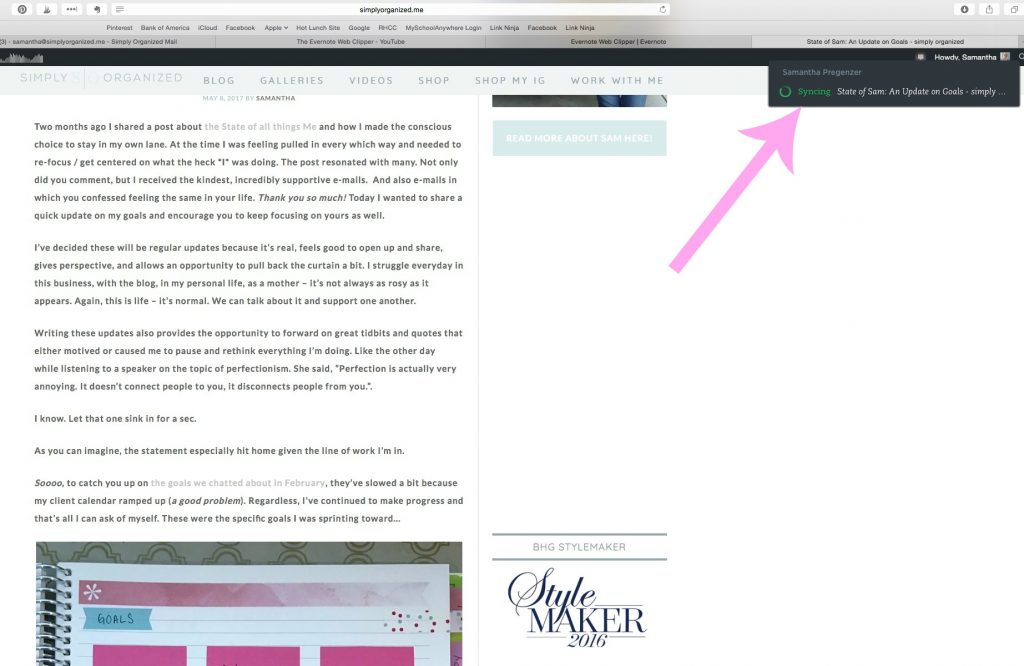
When you’re done, click “save” and Web Clipper has saved it to your Evernote account. Easy! You’ll see a status update showing when it’s been completed…
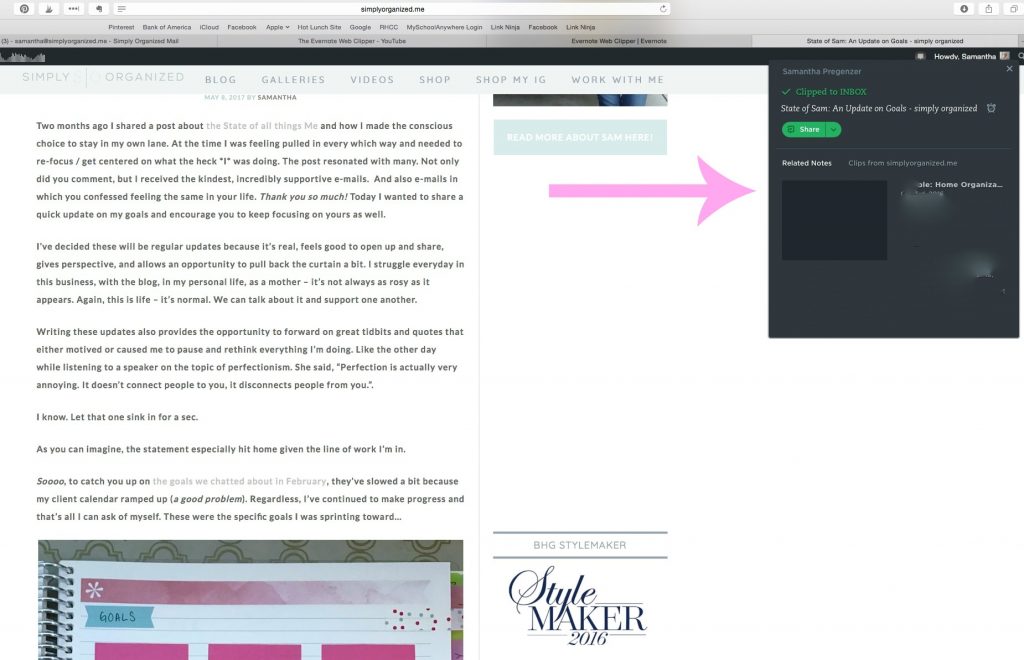
The Web Clipper will also show you related notes you have saved in your account. Kinda cool!…
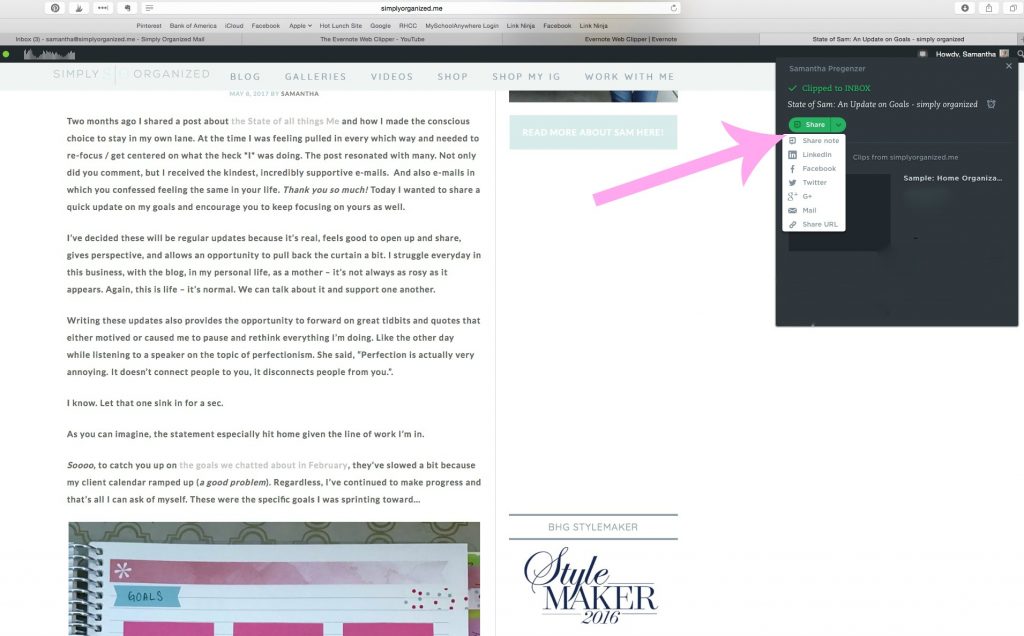
Finally, once saved, you can share it if you wish!…
That’s it!
Well, that’s how easy it is to clip and save…but you can do much more, like highlighting important details BEFORE saving…
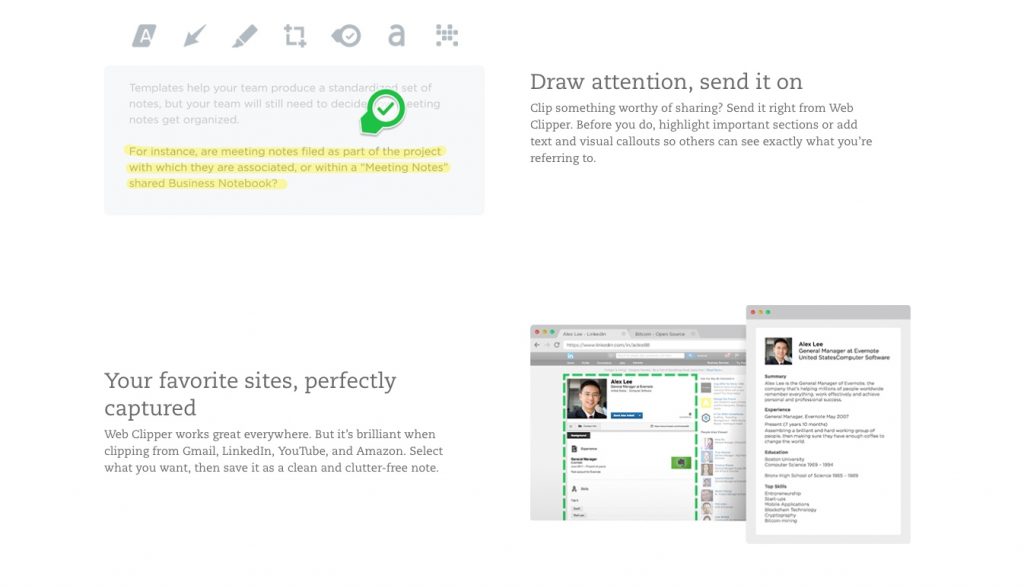
The Web Clipper doesn’t just clip from the web, you can also clip from e-mails or pdf’s and more. This feature has been a lifesaver in my business. When a client e-mail’s something specific, I can clip and save it to their “notebook” in my Evernote account. All of their info is securely saved in one spot and it’s easy for me to find. AND …. I can access it from anywhere because I have the Evernote app on my iPad and phone. I can even share the file with them if we are working on a space together.
We’ve been talking a lot about meal planning and how digitizing the process can be helpful. The Web Clipper is an incredible resource for saving recipes found online or a recipe friends / family sent in an e-mail. You can also scan a recipe in your kitchen using the app. If you’re visiting a friend who made a delicious recipe you’d like to have – and they are willing to hand it over (haha!) – just take a photo of it in Evernote or scan it and it’s saved forever! You can add notes to the recipes and pull them up on your phone or iPad while cooking…or shopping for the ingredients…because you know, sometimes we forget ingredients. #guilty
I hope this little tutorial has piqued your interest to get started with Web Clipper. If you don’t have an Evernote account, I hope this post inspires you to join. I’ll be sharing more Evernote tips and wouldn’t want you to miss out on the organization fun! You can join here using my referral link!
Happy digital organizing!
I love your blog and Instagram account – and am also an Evernote freak! I’ve documented so much in the last 5-6 years and it’s one of my holy grail apps.
That said, if you’ve got someone’s ear from Evernote, can you PLEASE tell them that the Table function is less than ideal! I’ve tweeted and written on their blog, but years later it’s still so difficult to use and the tables in my notes never look good. It’s the one thing I hate about Evernote, and it doesn’t seem to be getting any better. Just more expensive :/
Thanks for all of your inspiration!
Awe, thank you so much for your sweet comment! Means so much to me!
Matter of fact, I do! Let me send along that note and see what response they have. Maybe it’s something they can update!
xx,
Sam
thank you! and thanks for indulging my OCD 🙂